Dreamweaver/Hyperlinking & Embedding Media or Documents
Creating a Hyperlink to a File

You can use the Property inspector and the Point-To-File icon to create links from an image, an object, or text to another document or file.
Dreamweaver creates the links to other pages in your site using document-relative paths. You can also tell Dreamweaver to create new links using site root–relative paths.
You can use the Property inspector’s folder icon or Link box to create links from an image, an object, or text to another document or file.
- Select (highlight) the text or an image in the Document window’s Design view.
- Open the Property inspector (Window > Properties) and do one of the following:
—Click the folder icon to the right of the Link box to browse to and select a file.
—The path to the linked document appears in the URL box.
—Type the path and filename of the document in the Link box.
—To link to a document in your site, enter a document-relative or site root–relative path.
—To link to a document outside your site, enter an absolute path including the protocol (such as "http: // ..."). - From the Target pop‑up menu, select a location in which to open the document:
—_blank loads the linked document in a new, unnamed browser window (or tab).
—_parent loads the linked document in the parent frame or parent window of the frame that contains the link.
—_self loads the linked document in the same frame or window as the link. This target is the default, so you usually don’t have to specify it.
—_top loads the linked document in the full browser window, thereby removing all frames.
- Recommended: for audio, video or other files that are NOT "embedded" in the web page you created, select the Target of "_blank" so that the file will open in a new window or tab.
Embedding Audio or Video Files Hosted from Your Own Web Server
You can embed a variety of video or audio file formats. Some are native to the PC such as video in the WMV format or sound in the WAV format and may not play in all browers or on the Mac. The most reliable video file format across many browsers and both PC and Mac computers is MP4; the most reliable sound file format is MP3.
- Recommended: Convert your video or sound files to MP4 (video) or MP3 (audio) formats for best results.
See This Free Online Service for help in conversion of file formats.
To embed a file which will be hosted on your own web server, you will use a special "embed" script and an "object" called Active X. This Active X object will display content using a "plug-in" on the web browser of the user visiting your site, such as Quicktime player or RealPlayer or Windows Media Player, to view the movie or listen to the audio that your are hosting.
Steps to Embed a Video or Audio File as an Active X Object


The object will be placed within a cell/row of your table in your Catalog or Gallery web page for your portofolio.
In the same or an adjacent cell you may give the object a title and a description.
To place and define the object take these steps:
- Put your insertion point where you wish it to be
- Using the menu choose Insert>Media>Active X
- Enter a Title for the Object in the dialog
- The object will be placed and can now be modified:
—Set the size
Recommended:
if an audio file, set size at W=380 H=100; if a video file for a half page, W=380 H=285; if for a full page (a full row), H=640 H=480. - Check the box for "Embed"
—in the field Src use the folder/explorer to link to the audio/video file - Click in the field ClassID and type or paste this attribute:
QuickTime CLASSID: clsid:02BF25D5-8C17-4B23-BC80-D3488ABDDC6B
NOTE: this is recommended value.
You have the option of also selecting other Active X object classes such as:
RealPlayer/clsid:CFCDAA03-8BE4-11cf-B84B-0020AFBBCCFA
Windows Media Player CLSID:22d6f312-b0f6-11d0 -04ab-0080c74c7e95 - Your Active X object is now ready for display.
- Change Parameters to change the default for "Autostart"
—Enter the Parameter "autostart" and set the value to "false"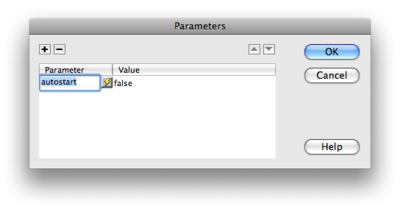

Embedding Audio or Video Files Hosted on YouTube™
This is a process that is easier to do than to explain.
You do not need to understand coding to do this, although it is pure code which does it.
Every hosted item on YouTube™, including those which you have uploaded at "unlisted" or "private" can be displayed on a web page you have created.
The embedding of such a hosted file will be similar to these steps for YouTube™. See the host for instructions.
Steps to Embed a YouTube™ File
If you are creating a portfolio, using the instructions How to Make a Website (DW), then you have used a table to organize the content on your page.
- Go to YouTube™ and copy the "embedding code" for your video/audio.
NOTE: this is not the URL; it is a special field of data. See example.
- In the Design View click in a cell (or wherever it is you want to insert your code).
- Switch to the Code View and Paste your "embedded" code.
- Switch back to Design View and you will see your "embedded" object as an Active X file.
NOTE: some features can be modified with the Properties.

Follow the same directions as above, except that you will use SlideShare™ as the host, and the site is dedicated to PowerPoint presentations specifically.
The embedded code will also result in an Active X object where you insert it.
- Go to SlideShare™ and login as appropriate. Follow instructions.
- Copy the "embedding code" for your video/audio.
NOTE: this is not the URL; it is a special field of data. See example.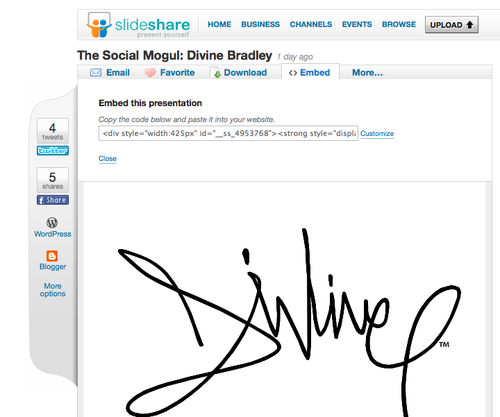
- In the Design View click in a cell (or wherever it is you want to insert your code).
- Switch to the Code View and Paste your "embedded" code.
- Switch back to Design View and you will see your "embedded" object as an Active X file.
NOTE: some features can be modified with the Properties.

Our Other Internal Help Pages for Dreamweaver Include
See also How to Make a Website for detailed instructions.
Other Resources
For a video tutorial on linking go to http://www.adobe.com/go/vid0149.
Online resources you will find useful:
- For general support on Dreamweaver from Adobe: Here...
- For ADOBE TV tutorials on Dreamweaver: Go Here instead...
- For online (web) help on specific topics go to Adobe's own help site: Here!
- For an official Adobe Manual on Dreamweaver: Download This!