How to Reset Your WSU iPad
Before returning your WSU iPad to the TSC you must perform the following steps to reset your iPad.
- Any mailed in iPad termination will have to do this before it is mailed back.
- Anyone returning their iPad to the front desk of Tech Support will have to do this before returning it.
Watch the Video
Instructions
- Before you begin, please make sure the iPad is connected to wi-fi. The iPad requires a wi-fi connection to disable "Find My iPad" and to disassociate itself from your Apple ID as it is erased.
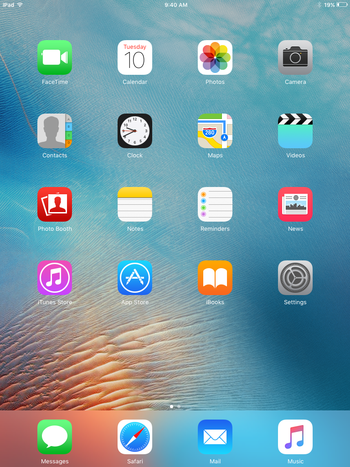
1. Open the Settings app from your home screen.
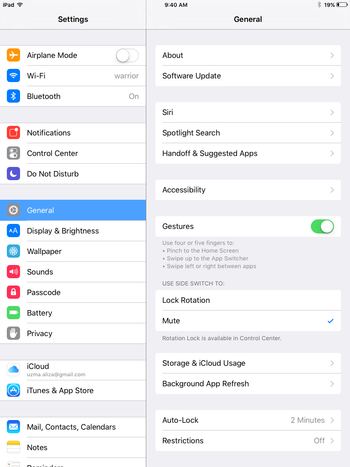
2. Go to the General tab in your Settings app.
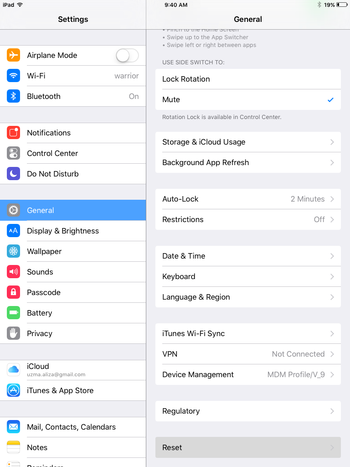
3. Scroll down and select Reset.
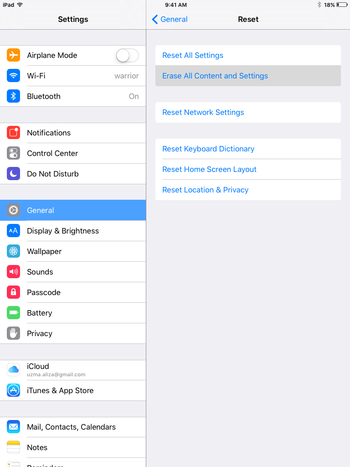
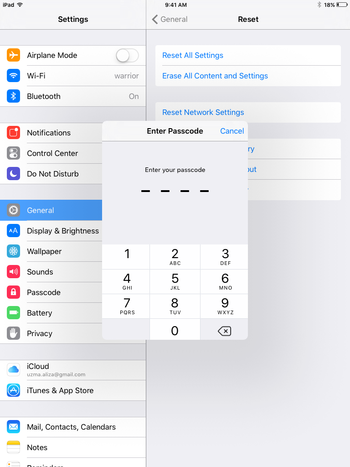
4. Select Erase All Content and Settings.
5. Enter in your iPad passcode (that you use to unlock your iPad).
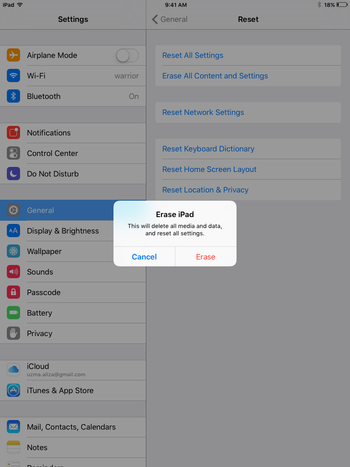
6. Click Erase.
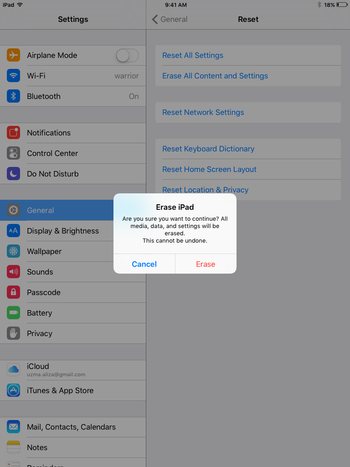
7. Click Erase again.
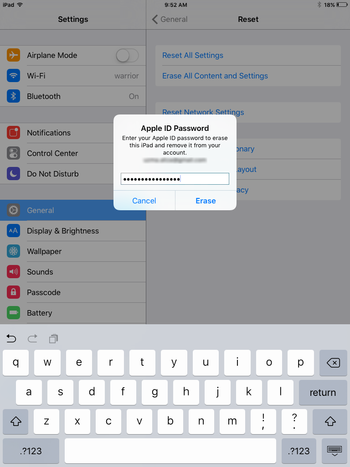
8. Enter in your Apple ID password and click Erase, this will begin the reset process.
9. The process is complete when you see the Apple logo on the screen and a loading bar at the bottom.
10. After the device has been erased a white Apple start screen will appear and the device will be ready to return.
Post Buy-out Instructions
After buying out your IPad you will need to wait at least 48 hours before you can reclaim ownership of the device from WSU/Apple. To reclaim ownership you will need to restore it using the instructions below. Make sure your IPad is backed up and charged up, and that you have Apple ID and password ready. If you do not know your Apple ID password, you can reset it at iForgot.Apple.com.
Restoring your Apple iPad
1. Ensure nothing is plugged into your iPad, then turn it off and leave it off.
2. Plug in your Apple Lightning USB cable into your computer and open iTunes.
3. Now hold down the Home button and plug in the Lightning cable into the iPad. Keep holding down the Home button until you see the Connect to iTunes screen.
4. When you see this screen, release the Home button. If you don’t see this screen, try steps 1 through 3 again. You may also need to try using a different Apple Lightning USB cable.
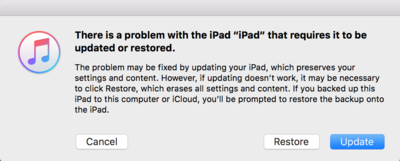
5. When your device is connected, iTunes will open. You’ll see a message saying that iTunes has detected an iPhone, iPad, or iPod touch in recovery mode.
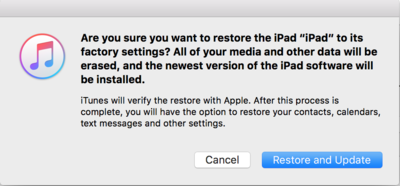
6. Use iTunes to restore your device. Restoring in recovery mode will erase your device. If you previously synced with iTunes or iCloud, you should be able to restore your backup during device setup.
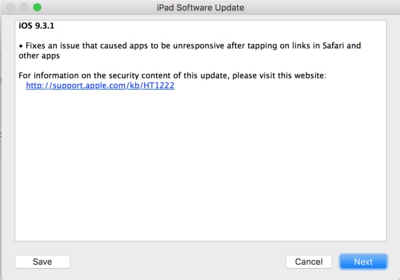
7. A window will pop-up detailing the software update that will be applied to your iPad. It will also ask you to agree to the Terms & Conditions.
The iPad will automatically leave restore mode if the software update download takes longer than 15 minutes. If the iPad restarts before the download is finished you will have to unplug your iPad and restart it in recovery mode again to complete this process.
