Adobe Premiere
Adobe Premiere is a movie editing software powered by Adobe. It has three different versions to tailor to different skill levels and needs: Premiere Express, Premiere Elements, and Premiere Pro.
Adobe Premiere Pro is provided by WSU and can be installed by following instructions with [[Installing Software From The Network]
Premiere Pro General Overview
Creating a New Project
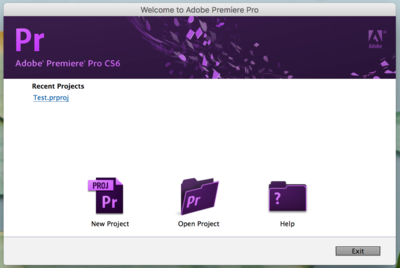
Once Premiere Pro is open this screen will appear:
Here you will see:
- Recent Projects. This is a list of recent projects you have created in Premiere Pro. If you want to open a recent project, click on the name of the project that is listed.
- New Project. This opens a new project.
- Open Project. This allows you to search your computer for Premiere Pro Projects that may not be listed under the Recent Projects menu.
To create a new project select New Project.
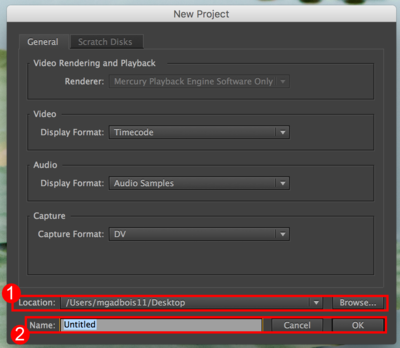
A new menu will appear.
1. Select the location you want to save your project. To do so click the Browse button on the right side and search for a folder or location to save your project.
2. Name your project.
Once done, click ok.
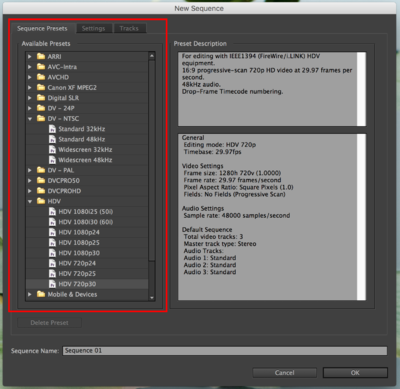
Adjust your Sequence Settings to match those of the videos you are importing. A sequence in Premiere is a timeline where you can place and edit your videos.
If you filmed your video with an iPad, the best sequence settings would be HDV 720p30 (as shown in the picture). Select it and click ok.
If you do not know what type of video format or settings your videos have, choose the one Premiere automatically selects and click ok.
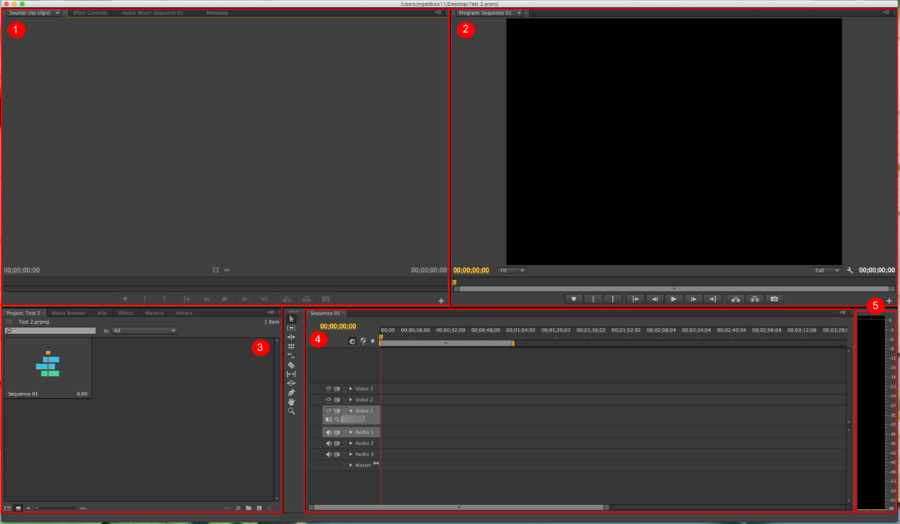
Now Premiere will open a new project window. Let's run through the sections on the Premiere Pro Interface.
Premiere Pro Interface
1. Media Viewer/Effects Control: This panel allows you to preview media you've imported before selecting it to put in your timeline. Another tab titled Effects Controls allows you to adjust different effects you've put on clips in your Timeline.
2. Project Viewer: This panel is where you view/play your project as it is in the timeline.
3. Media/Effects Browser Panel: This panel allows you to import your media along with choosing and selecting media to drag into your timeline. The panel also includes an Effects Tab that allows you to browse all the audio/video effects and transitions available in Premiere Pro.
4. Timeline: The timeline is where you create your project. You drag clips, effects, and transitions into the timeline to form your project/video.
5. Audio Levels: Shows your audio levels when a video is playing.
This this the Tool Bar (located to the left of the Timeline). These are the three basic tools you will need to use.
1. Selection Tool: Allows you to click and select things in the timeline
2. Razor Tool: Allows you to cut or split clips
3. Hand Tool: Allows you to move and drag the timeline.
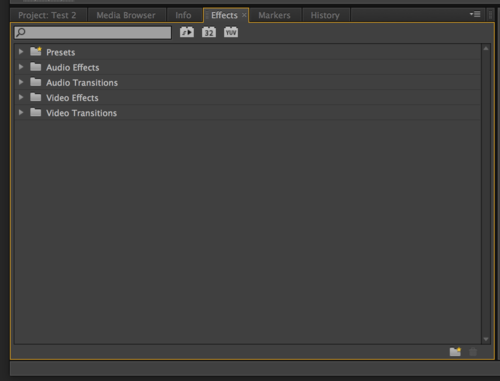
This is the Effects Tab on the Media/Effects Browser. There are four different categories to choose from:
1. Audio Effects: This folder has effects you can apply to alter your audio tracks to improve the sound or even change the pitch.
2. Audio Transitions: This allows you to add in a crossfade in your audio tracks to smoothly transition from one audio clip to another.
3. Video Effects: This folder contains effects you can apply to alter your video like balancing the color.
4. Video Transitions: This folder contains various transitions you can place in your video to smoothly transition from one video clip to another.
Importing Media
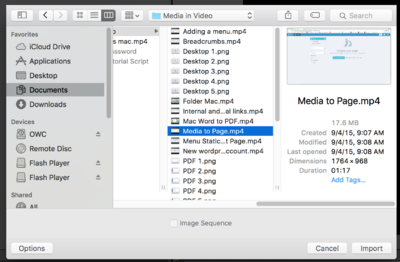
To import media to your Premiere Project, double click on the Media Browser. (An alternative way is to go to File then select Import)
Find and select which file(s) you want to import into your project. Then click Import.
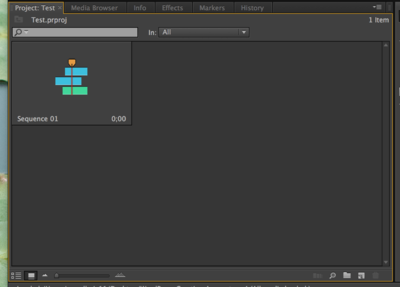
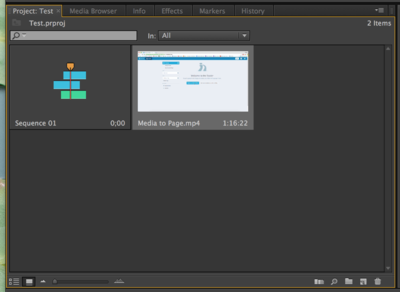
Your file(s) should now appear in the Media Browser.
Adding Clips to the Timeline
To add clips to your project timeline, select which clip you want in the Media Browser. Click and drag the clip over to the timeline and drop it in the section labeled Video 1.
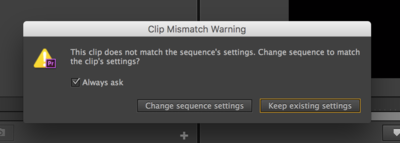
You may receive a message requesting you to change your Sequence Settings to match your clip's settings. Select Change Sequence Settings to keep you project formatted in a way that is compatible to your clips.
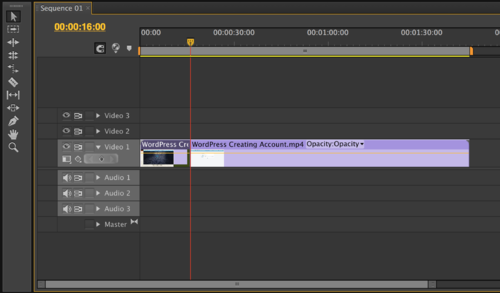
Now your clip should appear in the timeline. You can continue to add which clips you want to your timeline, or you can start to cut and edit the clips.
Cutting/Slicing Clips
An easy way to edit your clips and take out the parts you don't want is by using the razor tool.
Begin by selecting the razor tool in the tool bar (located to the left of the timeline). You can begin by watching your clip by pressing play (or hitting the space bar) and stopping the clip at the moment you want to cut your clip.
You can also drag the scrubber (the red bar on the timeline) to the point where you want to cut the clip.
Once you found where you want to cut the clip, make sure the scrubber is exactly where you want it because we'll be using it as a reference. Place your cursor on the clip in line with the scrubber and click.
Your clip should now be split in half.
To remove the clip you no longer want, switch over to the selection tool, select the unwanted clip, and hit delete on your keyboard.
You may have to move your clips to fill in the blank space left by the deleted clip. Just click and drag the clips until they line up with the end of another.
Cropping Clips
You can crop clips two different ways in Premiere Pro:
The first way is by selecting the clip you want to crop in the timeline, and then double clicking the picture of it in the Project Viewer. You will be given selection points on the edges to adjust the clip how you want it.
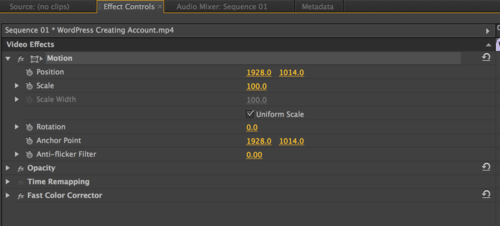
The second way is by selecting the clip you want to crop in the timeline, and then going to the Effect Controls in the Media Viewer. Open up the down menu for Motion and you can drag the numbers for position (x and y coordinates like a graph) and the scale. All changes will be seen in the Project Viewer.
Adding Effects
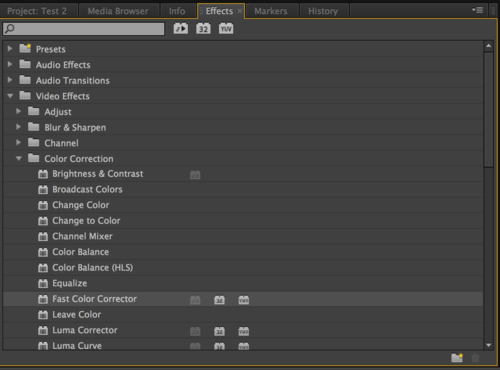
To add an effect to a video clip, go to the Effects Tab in the Media Browser. Open the Video Effects folder and search for the type of effect you want.
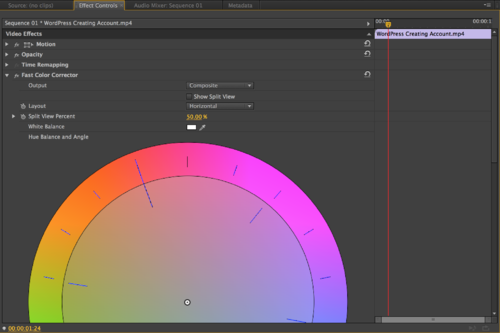
For this example, we're going to add an easy color corrector to the clip.
Select the effect you want and click and drag it onto the clip you want to add the effect to.
To adjust the effect you just added, select the clip in the timeline. Then go up to the Media Viewer and open the Effect Controls tab.
Here you'll see a few different menus including the effect you added. You can use the tools to adjust how the effect shows on your clip.
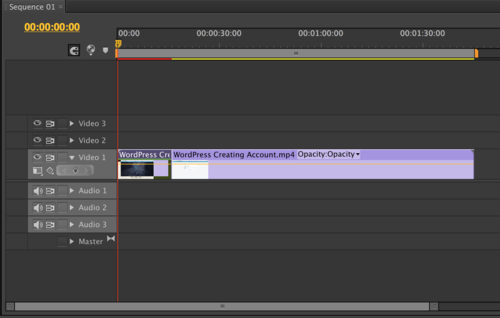
After adding an effect you'll need to render your project. Rendering is a process that allows the program to play back your project in real-time with all the effects and transitions added to it. If clips have a red bar above them instead of a yellow bar, that means they need to be rendered.
There are two ways to render your project:
1. Go to Sequence and then select Render Entire Work Area
2. Press Enter/Return on your keyboard
Give the program time to process the render and then you'll be able to playback your project and view the added effects.
Adding Transitions
You can add video transitions to your project to smoothly transition from one clip to another.
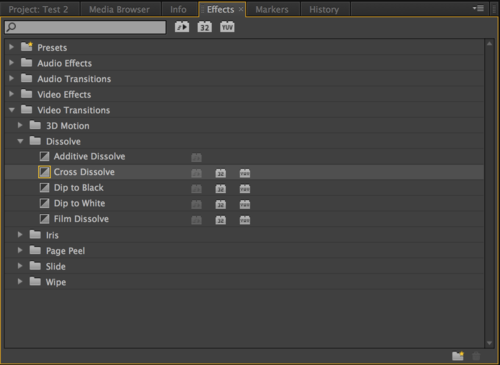
To add a transition, go to the Effects Tab in the Media Browser. Open the folder called Video Transitions and search for the type of transition you want.
Select the transition you want and drag it onto your timeline where you want a transition.
YBold textou can add transitions at the beginning of your project, at the end of your project, or in between two clips.
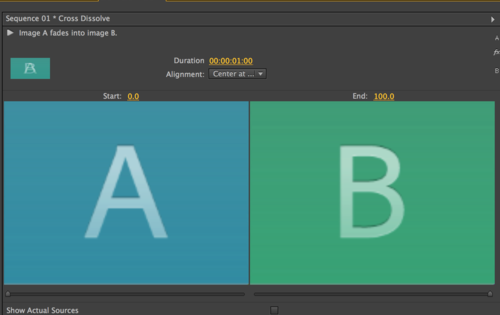
You can adjust the time the transition lasts by selecting the transition in the timeline, going to the Effects Control tab, and changing the duration.
After adding a transition you'll need to render your project. Rendering is a process that allows the program to play back your project in real-time with all the effects and transitions added to it. If clips have a red bar above them instead of a yellow bar, that means they need to be rendered. There are two ways to render your project:
1. Go to Sequence then select Render Entire Work Area
2. Press Enter/Return on your keyboard
Give the program time to process the render and then you'll be able to playback your project and view the added effects.
Adding Text
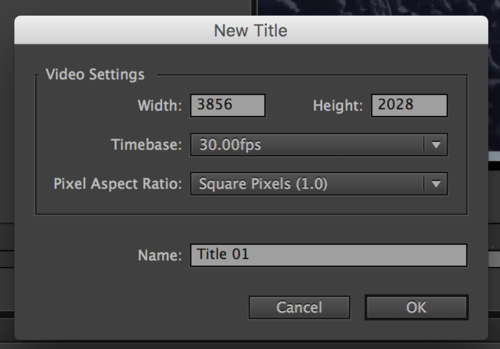
To add text to your project, to Title, New Title, and select Default Still.
A menu should pop up and you can name the title. This will not affect what text will appear on your project. Click ok.
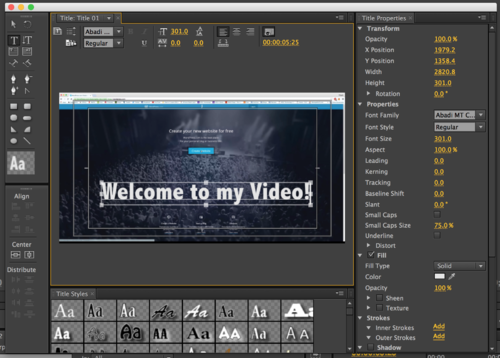
Click where you want your text to be and then type. You can edit the font, size, color and location of the text. There are also presets located on the bottom to help you out.
Make sure when you want to select the text, change over to the selection tool (the white arrow) in the tool bar.
Once you're done editing the text, close out of the screen by clicking the red button in the left corner or the X.
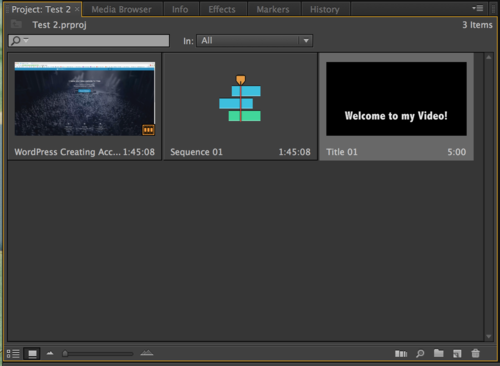
Your text should appear in the Media Browser. Now you can click and drag the text into your timeline where you want it.
Viewing Project
To playback your project in the timeline, start by making sure the scrubber (red bar) is at the very beginning of your video. If it isn't, click and drag it back. You can play your video two different ways:
1. Going to the Project Viewer and clicking the play button ![]()
2. Pressing the spacebar and viewing it through the Project Viewer
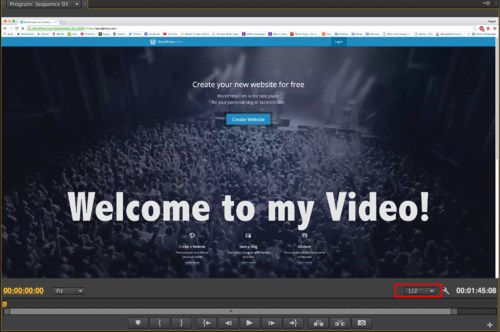
You can change the quality of the playback by going to the drop down menu just under the Project Viewer. Here you have options as to the quality of the playback such as full quality or half quality.
Exporting & Saving Project
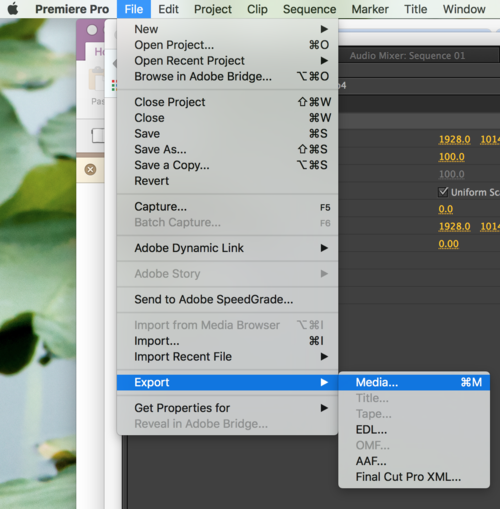
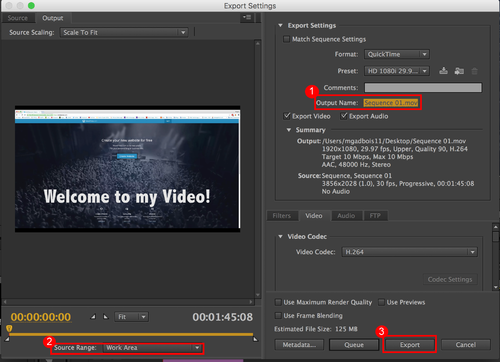
To export your finished video go to File, Export, and choose Media. Or you can hit Command M on your keyboard.
A new menu will appear to adjust the export settings for your video.
1. Output Name: Click on where it says Sequence01 and you can rename your video.
2. Source Range: This is the range of your timeline that you are exporting. If you want everything in your timeline, choose Work Area.
3. When all the settings are how you want it click Export.
Exporting could take a few minutes depending on how long your video is. Once the progress bar disappears, your video has been exported.
Premiere Pro automatically saves a project file for you when you create a project. You can keep the Premiere Pro project file for future editing for that project, but the locations of all the files you imported must remain the same. Otherwise, when you go to reopen your project, the files will be missing and you will need to find them again.
