DLC Spring 2019 Class Projects/Penny Warner Video with Kaltura Capture
Project Details
This project is designed to help students within Professor Warner's course to record components for your project. In this resource you will learn all about the tool we will be using Kaltura Capture to record and share your presentations in discussion board posts. The steps involved to complete your recording with Kaltura Capture are provided below.
Downloading Kaltura Capture
To access the Kaltura Capture you will need to follow the steps provided below.
- Use your favorite web browser to log into your MediaSpace account at mediaspace.minnstate.edu using your Star ID username and password. This will take you to your My Media page.
- Select Kaltura Capture from the Add New menu.
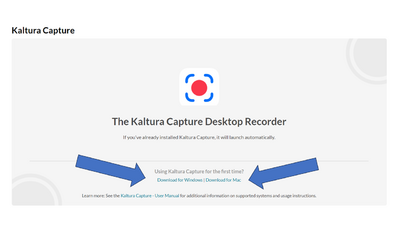
- Two options for downloading Kaltura Capture will be listed (PC and Mac) and after clicking on the appropriate version you will be asked to install the software vide setup wizard.
- Once you have installed the recorder, you will need to restart your browser and log back into MediaSpace and launch the Kaltura Capture recording tool.

Recording and Editing in Kaltura Capture

1. Select Kaltura Capture icon on your desktop or applications/programs folder. This will launch the desktop recorder. (NOTE: If you have not used Kaltura Capture before you will have to download the recorder.
2. The recorder will detect any cameras connected to your computer and show this in an image thumbnail. You may turn off the camera for this assignment as it is not required by clicking on the camera icon. When the camera is off the icon will turn white as in the clip below.

3. Next, you will need to select the screen you wish to capture. This is done by using the pull-down menu to the right of the screen capture icon as shown in the clip below. Also, make sure to set for Full Screen' to capture your entire display area or you may need at times to Select Area for recording a smaller section of your screen to capture detailed information on your screen.

4. If you are using a microphone other than your computers built-in device, you will need to select it from the list below the microphone icon.

5. Once you have the desired setting you can hit the red record button and the recorder will give you a 3...2...1 count down. Once recording you will have a recorder that gives you the time of your recording along with digital ink functionality for annotating on your screen (see clip below for an expanded view of this menu).

Note: During your recording, you are able to Pause the video. You can also Cancel the recording by clicking on the X in the recorder and start over if needed. When you are done recording, select Stop button (White box in the recorder) and you will be asked if you want to stop and you should select Yes, Stop it.
6. Next, you will see a preview window where you can play back your video, provide a descriptive title, save, and then select Save and Upload button. This step saveas a copy of your video locally on your computer and a version is uploaded to your MediaSpace account.

8. Once the process is completed, you can optionally select the link within the window and go into MediaSpace to view your recording. Do not copy this link to share your video. It is not the link to your recording. It may take a few minutes for your video to appear in MediaSpace. (If it has been more than 5 minutes and your video has not appeared in MediaSpace, try refreshing your page or logging back in.)
Posting Your Videos to Assignment Submission Folder


Instructions
Watch the Brightspace Assignments video for an overview of this process. To add a MediaSpace recording to a Brightspace assignments folder submission:
- Open the Brightspace assignments folder
- Under Files to submit, select Add a File or Record Audio and attach a file or audio recording to your submission.
- In the Comments area, add text if desired. Then, Position the cursor where you want to insert the MediaSpace recording and select the Insert Stuff button (Fig 1).
- Select My Media (Fig 2) from the Insert Stuff choices on the left (1), select the file you want to insert (2) such that it is highlighted, and select the Next button (3)
- Select the Insert button
- Select the Submit button to submit your assignment
Addition Kaltura Capture Resources
- The following articles include more information about using MediaSpace tools:
- MediaSpace
- A quick tour of the My Media page
- How to upload files with the Media Upload tool
- How to record videos with the CaptureSpace Lite tool
- How to record videos with the Webcam Recording tool
- How to create an interactive video quiz
- How to add closed captions to your recordings
- How to trim your recordings
- How to add MediaSpace recordings to Brightspace courses
- How to schedule media availability
- How to collaborate in MediaSpace
- How to build a playlist
- How to create and manage a channel
- How to tell whether people are playing your recordings
CaptureSpace Trimming Tool
DLC STARS/Presenter
Chad Kjorlien
- Phone: 507-457-5167
- Email: ckjorlien@winona.edu
- Office: Krueger Library #104
Other Resources
DLC Support
- Phone: 507-457-2206
- Email: dlc@winona.edu
- 1:1 Support: Krueger Library #105