DLC Spring 2020 Class Projects/EdTPA
Project Details
This article describes the process of recording and submitting teaching videos to the edTPA website. It is intended for students in the College of Education.
edTPA is a performance-based, subject-specific assessment and support system used by teacher preparation programs throughout the United States to emphasize, measure and support the skills and knowledge that all teachers need from Day 1 in the classroom. For each handbook field, the placement is a Pre-Kindergarten to 12th-grade classroom. edTPA is a subject-specific assessment that includes versions for 27 teaching fields. The assessment features a common architecture focused on three tasks: Planning, Instruction, and Assessment.
Aspiring teachers must prepare a portfolio of materials during their student teaching clinical experience. edTPA requires aspiring teachers to demonstrate readiness to teach through lesson plans designed to support their students' strengths and needs; engage real students in ambitious learning; analyze whether their students are learning, and adjust their instruction to become more effective. Teacher candidates submit unedited video recordings of themselves at work in a real classroom as part of a portfolio that is scored by highly trained educators. edTPA builds on decades of teacher performance assessment development and research regarding teaching skills and practices that improve student learning.
In addition to this Custom Student Support article, the DLC will provide face-to-face training on January 31, 2020, from 1:00 pm-2:00 pm in Helble #224.
Hardware/Software
Recording your video
Selecting a camera
You can use any camera you like, as long as there is a way to upload the raw video from the camera to your laptop. That could include a personal phone, tablet, or other cameras you know how to use well. Keep in mind you will be nervous and in front of others have to teach content that might also be newer and you want it to go well. Choosing a device that you have used and do lots of practice recording before you actually going to do in front of the class. You also may want to consider the following points as you plan for success.
- Get a tripod to hold your camera. Having someone in the room to hold your camera might distract students and you while you record.
- Check out an iPad at Tech Support. We have iPads and tripods that can be checked out for EdTPA student use. All you need to do is head over to Tech Support (Somsen 207) with your student ID and we can get you checked out with these for two weeks.
Recording with iPhone or iPad
Recording with an iPhone or iPad is an excellent way to get a quality recording. The following directions from Apple show you how to record.
Recording with Android Phone
With the many different versions of Android devices, you will want to search online for your specific device for the best settings to record. However, this How to Record Video With an Android Phone is a great starting place to get started.
Before Recording Checklist
The process for recording requires some preparation and this checklist is designed to be done the day before or on the day of your recording. Keep in mind the room you will be teaching in will need proper lighting turned on so the camera can picky you up and the device is close enough to you to pick up your voice while you present in front of your class.
![]() Check Storage Capacity.
Check Storage Capacity.
![]() Check the battery on your device to make sure you have enough battery life (80% or higher) to do your entire recording.
Check the battery on your device to make sure you have enough battery life (80% or higher) to do your entire recording.
![]() Turn off cellular services before you begin (AKA Airplane mode) so you don't get a call during your class.
Turn off cellular services before you begin (AKA Airplane mode) so you don't get a call during your class.
![]() Turn off all notifications to your device.
Turn off all notifications to your device.
![]() Do a soundcheck!
Do a soundcheck!
![]() Remove student name-tags or position the camera so these are not captured in your video.
Remove student name-tags or position the camera so these are not captured in your video.
Readying your video for submission
Upload the raw video to your laptop
If you used your personal phone or tablet to record your video, upload your video to your laptop just like you upload other videos or photos.
If you are using an iPad Mini from Tech Support or an iOS device of your own, here are instructions on on transferring photos and videos from your iPhone, iPad, or iPod touch to a Mac or PC.
Trim the video
The only edits you are allowed to make to the video is trimming the start of the video and the end of the video. There are almost always some seconds worth of video recorded between the time you press Record and you are ready to begin. Likewise, there is always some video of you walking to the camera after you finish to press Stop. This is your chance to remove those parts of the recording. No other edits are allowed.
If you are on a Mac, you can use iMovie to trim the head and tail. There are instructions on how to trim video here.
If you are on a Windows machine, you can trim your video in the Photos application. There are instructions on trimming with Photos here.
Compress the video
There is a 500MB size limit on the final video. If your video is under 500MB, you do not have to compress and you can skip this step.
If your video is over 500MB, use Handbrake to compress it. You can download Handbrake from their website. Once it is installed, follow these steps:
- Open the Handbrake application.
- Handbrake will open with a browser window. Find your video and open it.
- Tell Handbrake where to store your finished video. There is a Browse button at the bottom of the application to specify the destination.
- Press the Start button in the navigation bar. Compression will begin.
- When compression finishes (there is a progress bar in the application), the finished video will be stored on your laptop in the destination you specified.
Adding Captions
Some are choosing to add mechanical captions to their videos. If you are planning to add these to your videos you must order these in MediaSpace and then you will download before you compress the files within Handbreak. The following directions walk you through the process of downloading the mechanical captions.'
- Login to MediaSpace
- Click the title of the video you will use for your submission.
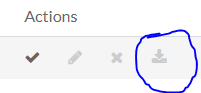
- Go to the Action menu and select Edit.
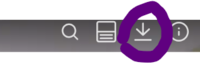
- Click Download folder icon in the bottom right portion of the player window.
- Click the Captions tab.
- Click the download arrow at the end of the English SRT file line (this can be hard to see as it is very light and in gray).
- Save this file into a folder you have your video.
- Open the downloaded video in HandBrake.
- Click the Subtitles tab.
- Select the Tracks pulldown menu and choose Add External SRT
- Chose SRT file.
- Clicked “Burned in” checkbox in the middle of the English.SRT row.
- Rename the file and choose a save-to location.
- Click the start button.


The resulting file will now include burned-in subs that cannot be turned off.
Uploading to edTPA website
Once your video is trimmed and compressed, it is ready for upload to edTPA.
If you have never registered with edTPA, go to the edTPA website and register. Right below the big image is a series of three boxes with links in them. In the Candidates box, click the Register now link to create a userid.
There is an instructional video from edTPA that describes the steps in submitting files and videos to the website. You can view that video here. Additional information on the upload process and the edTPA experience is available at Prepare: Online Learning for Pearson ePortfolio Users.
Note: The edTPA website requires Flash for its interface and videos. If you are prompted to install Flash as you traverse the website, follow the steps to do the install.
Other Resources
DLC STARS/Presenters
- Chad Kjorlien
- ckjorlien@winona.edu
DLC Support
- Phone: 507-457-2206
- Email: dlc@winona.edu
- 1:1 Support: Krueger Library #105