Draft:Use rules to organize email
Revision as of 17:56, 24 April 2020 by Ceanderson16 (talk | contribs)
The printable version is no longer supported and may have rendering errors. Please update your browser bookmarks and please use the default browser print function instead.
Create Rules in Outlook to help organize your inbox.
Creating a New Folder
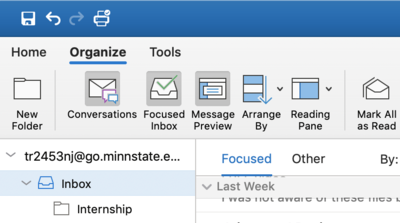
This new folder will be the designated spot for all the emails that follow your new rule. To create a new folder:
- Find the Organize tab at the top of the screen.
- Click New Folder in the top left.
- Name this new folder.
Creating a New Rule
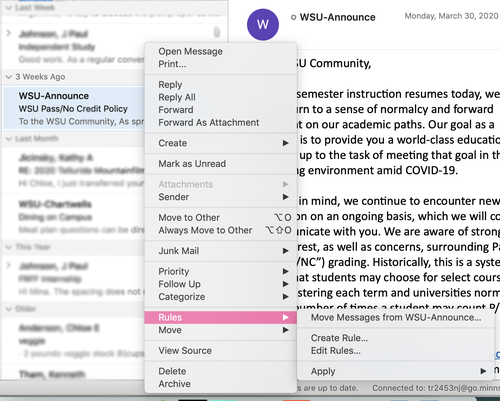
1. To create a new rule, right click on any message
2. Go down to Rules
3. Click on "Create Rule..."
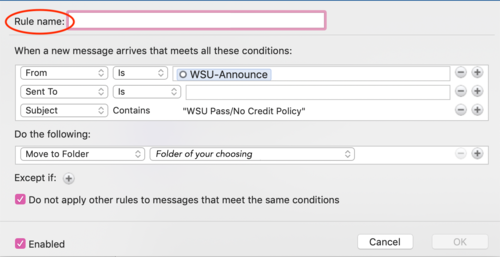
4. In the new dialogue box that pops up, there are a variety of settings you can change to fit to your preferences.
- At the very top, you can costumize your rule name
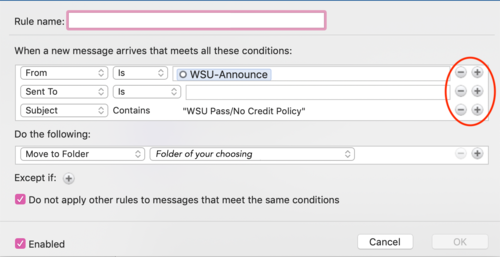
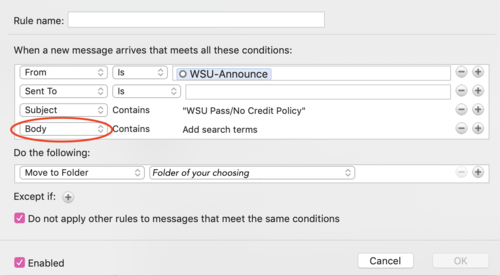
- In the next box, there are three default settings that can be added or taken away. When you click the + sign, a new set of criteria will be added. When you click the - sign, the criteria will be taken away.
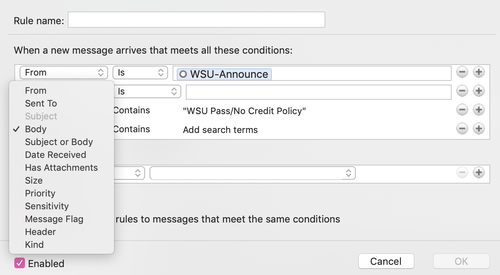
- If you wish to add criteria, by default the new criteria will say Body. If you click it, a new drop down menu will appear with all the other options.
5. After all your criteria is set, the next box that says, Do the following: is what happens to the email. Repeat steps in #4.
Example
- For example, if you would like certain emails from somebody to go into a specific folder instead of your inbox, you can add their email to the 'From line.
More wiki articles
External links
Except where otherwise noted, text is available under the Creative Commons Attribution-NonCommercial-ShareAlike 4.0 International License.
