Draft:Windows 7 Backup and Restore
Revision as of 18:09, 19 January 2019 by KGraetz (talk | contribs) (KGraetz moved page Windows 7 Backup and Restore to Draft:Windows 7 Backup and Restore without leaving a redirect)
This Page is for Students Only
Windows 7 offers a full automatic backup on your PC. The instructions below are for backing up information on the WSU laptops.
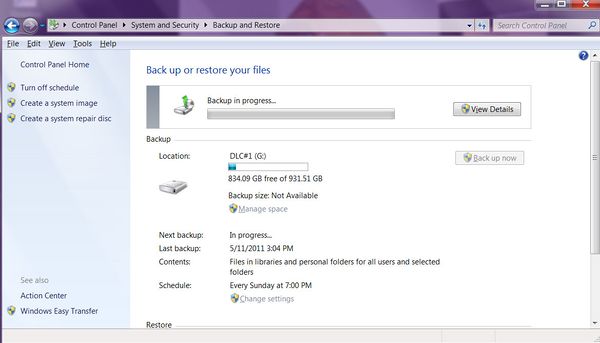
- Go to Control Panel > System and Security > Backup and Restore or type "backup" in the "Search programs and files" box located in the bottom left corner of the desktop. the Backup and Restore option will appear in a list.
- Click on "Set up backup" under "Back up or restore your files".
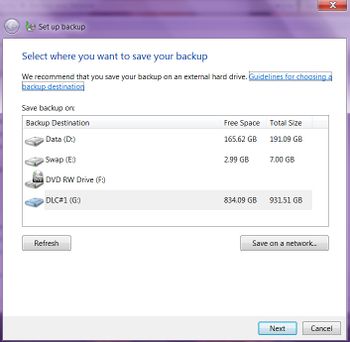
- Select where you want to save your backup and click on "Next".
- An external hard drive is the best option. Other options would be CD, DVD, Flash Drives, etc. Make sure that you have your external hard drive or flash drive plugged into your computer in order for it to be selectable. If your drives have security passwords to unlock them, make sure that you've input your password.
- Pick if you want to Let Windows choose or if you want to choose which files to backup.
- Recommended for WSU students: We recommend the "Let me choose" choice and then click on "Next".
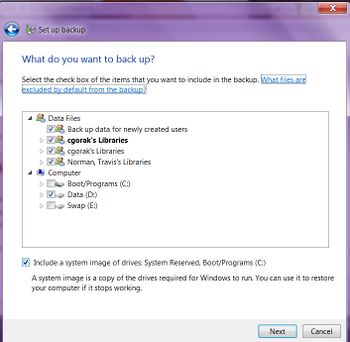
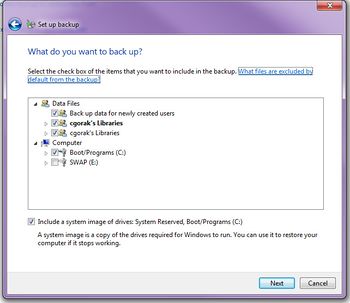
- Select the folders that contain the files that you wish to backup.
- If backing up WSU laptops make sure the "Include a system image of drives: System Reserved, Boot/Programs (C:) box is unchecked.
- Click on Next
- Review your backup settings
- Schedule the backup if you want it to automatically run at a scheduled time
- Click on "Save settings and run backup".


