Difference between revisions of "Edit your Brightspace profile"
| Line 20: | Line 20: | ||
===Step 4: Save Image=== | ===Step 4: Save Image=== | ||
| − | Your profile picture should now be displaying. If you would like to select a different image select the ''Trash Can'' icon and start the process over from Step 1. If you | + | Your profile picture should now be displaying. If you would like to select a different image select the ''Trash Can'' icon and start the process over from Step 1. If you are pleased with your profile picture, select '''Save and Close''' at the bottom of the screen. |
[[File:Profile 7.jpg|center|450px]] | [[File:Profile 7.jpg|center|450px]] | ||
Revision as of 15:50, 22 May 2018
Overview
In D2L you can edit your profile to include additional information about yourself. You can also add an picture that will display in the thumbnail icon next to your name for your activity within D2L. Additional items you can add to your profile include social networks, contact information, education and work, and personal information.
Adding a Profile Picture
Adding an image to your profile is a nice way to personalize your profile. This image will appear at the top of the homepage as well as next to your name next to all of your activity in D2L. Once you add an image this will be applied to all of your activity in all of your courses in D2L. You only need to complete this process once. Most instructors will request that you use a picture of yourself and not an icon. Close up pictures of your face tend to work best. Follow the steps below to add an image to your D2L profile.
Step 1: Edit Profile
From the D2L Homepage or within any D2L course select your name in the top right corner of the page. Then select Profile from the drop-down.
Step 2: Change Picture
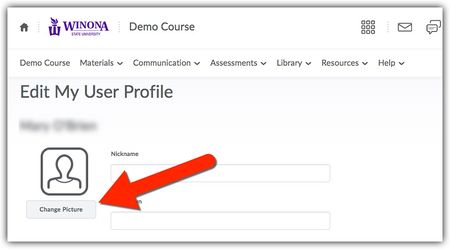
This next page is your D2L profile. On the left side under the icon select Change Picture.
Step 3: Upload Image
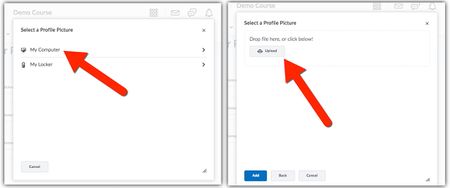
To select a picture saved on your computer select My Computer and then Upload to search your computer for the image.
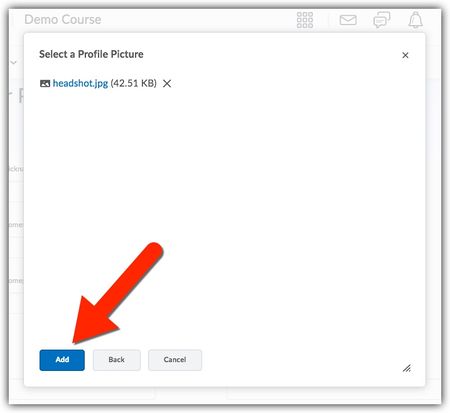
Once you have selected the picture you would like select Add at the bottom of the page.
Step 4: Save Image
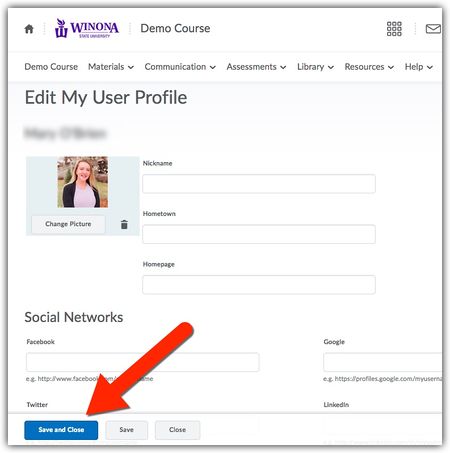
Your profile picture should now be displaying. If you would like to select a different image select the Trash Can icon and start the process over from Step 1. If you are pleased with your profile picture, select Save and Close at the bottom of the screen.
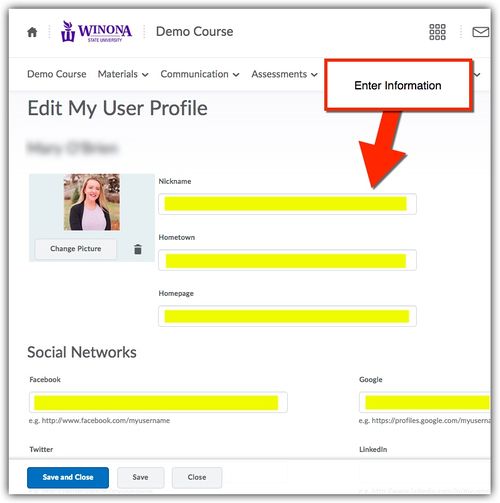
Editing Profile Information
To add additional information to your profile simply type in the fields provided. It is up to you what information you would like to include. If you do not enter information within a field it will remain blank. Once you have entered the information you would like to display on your profile select Save and Close at the bottom of the screen. As a reminder the information that you enter in your profile can be viewed by your classmates and instructor. Only enter information you wish to share.

