Finder (Mac)
For a brief video on the Finder: Click Here!
Managing your Mac with Finder
Your system and applications are located in file folders inside your hard drive icon (“Macintosh HD”). Do NOT move or delete these files. To correctly remove or uninstall an application, use the instructions provided for that application.
If you want an icon for an application on your desktop you can create an “Alias” for it by selecting it and using a Right-Mouse menu to select that option. The Alias icon can then be placed where you wish to put it.
All of your data files, including your music and picture files, are kept inside a special Home Directory which is identified by your user logon.
Finder and File organization
You can use your Finder to view/find the files that you have stored on your computer, on attached devices (such as portable hard drives or flash drives, and in network storage. The Home Directory is where your files are automatically stored.
Your Home Directory consists of eight folders that are referred to as the “root” folder for that “directory.” These root folders include Desktop, Documents, Library, Movies, Music, Pictures, Public, and Sites.
The Desktop folder includes all of the files on the desktop which you see when you start up your Mac and which appears to be underneath this Finder Window. When backing up your important files, you will need to make sure that you back up this “Desktop” folder. See more about backing up below.
The Documents folder is where Microsoft Office applications save your Word, Excel, and PowerPoint files by default. Your iTunes Music go into the Music folder and iPhoto pictures go into the Pictures folder. When you download something, it will automatically be placed inside your Downloads folder.
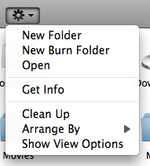
By clicking the drop down “Cog” button you will have clickable access to creating a New Folder, opening the file, Get Info, and other options for this file or this place in the directory.
Get Info is the used when you would like to modify important attributes of the file. This function can be used to change the name of the file, the file extension, the color label, the icon and security and sharing settings. At the top of every finder window you will find a red, yellow, and a green button. The red button closes the open window. The yellow button reduces the window to your dock. The green button enlarges the size of the window. Below the three buttons you will find a right and left navigation button.
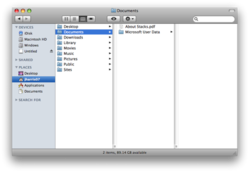
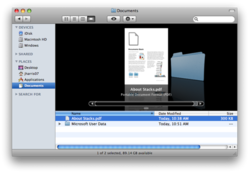
The three buttons to the right of the navigation button control the way that you VIEW your files in the window. You can view them as icons, as a list, in columns of folders and contents, and in Cover Flow.
This View is good for seeing how documents are stored inside the hierarchy of folders on your computer.
It will show you what the actual document selected looks like. If you press your space bar, it will open that item into a full preview.
Creating a Directory or File Organization
Many students create new folders in their Home Directory or inside Documents or other folders to keep class files and personal files organized.
By using a rigid file organization structure you can more easily back-up data.
It will also make it easier to locate and use files for your senior portfolio project.
An example of such a file structure is shown here.
Other Resources
For online help on Finders and Docks at Apple:Click Here!
On the PC, the Windows Explorer or My Computer is similar to Finder


