Difference between revisions of "Create self enrollment Brightspace discussion groups"
(Created page with "'''How to Create a Self-Enroll Discussion Groups in D2L Brightspace''' 1. Log into D2L Brightspace using your STAR ID and Password. 2. Once logged into your course, go to ''...") |
|||
| (2 intermediate revisions by the same user not shown) | |||
| Line 11: | Line 11: | ||
[[File:enroll1.jpg]] | [[File:enroll1.jpg]] | ||
| − | 4. On the next page you will title the group category. Then select the drop-down under | + | 4. On the next page you will title the group category. Then select the drop-down under '''Enrollment Type'''. There are three self-enrollment options. Select the option you would like and enter the '''"groups of # "''' and/or '''"# of groups"''' information. |
[[File:enroll2.jpg]] | [[File:enroll2.jpg]] | ||
| − | 5. Scroll down to the section titled | + | 5. Scroll down to the section titled '''Advanced Properties'''. If you would like you can set a expiry date for self-enrollment and can have students be randomly allocated to a group after the date has past. To set up the discussion boards scroll down to the section titled '''Additional Options'''. Check the box '''Set up discussion areas'''. Select an existing forum or create a new forum. Next select '''Save'''. |
[[File:enroll3.jpg]] | [[File:enroll3.jpg]] | ||
| − | 6.On the next page you will set up your discussion board. You have the option of having a separate discussion topic for each group or | + | 6.On the next page you will set up your discussion board. You have the option of having a separate discussion topic for each group or have one topic with separate threads. NOTE: If you pick the second option this will allow you to connect one grade item to your group discussion boards. Next select '''Create and Next'''. |
[[File:enroll4.jpg]] | [[File:enroll4.jpg]] | ||
| − | 7. On the next screens select | + | 7. On the next screens select '''Done''' and '''Save''' until you are back on the main page. Your self-enrollment groups and discussion board are now created. Students will now need to enroll in the groups. |
[[File:enroll5.jpg]] | [[File:enroll5.jpg]] | ||
[[Category:Instructors]][[Category:D2L]][[Category:Groups]] | [[Category:Instructors]][[Category:D2L]][[Category:Groups]] | ||
Revision as of 18:54, 4 October 2018
How to Create a Self-Enroll Discussion Groups in D2L Brightspace
1. Log into D2L Brightspace using your STAR ID and Password.
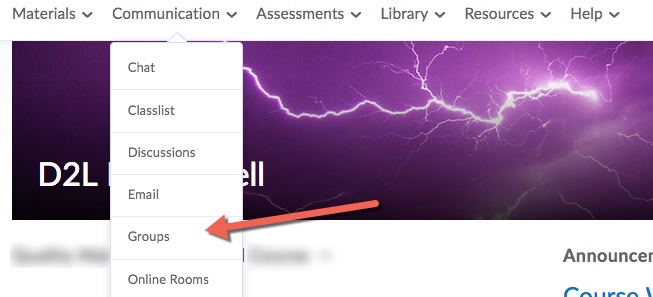
2. Once logged into your course, go to Communication and Groups.
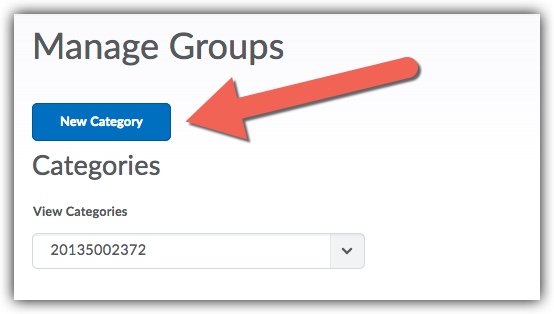
3. Select New Category
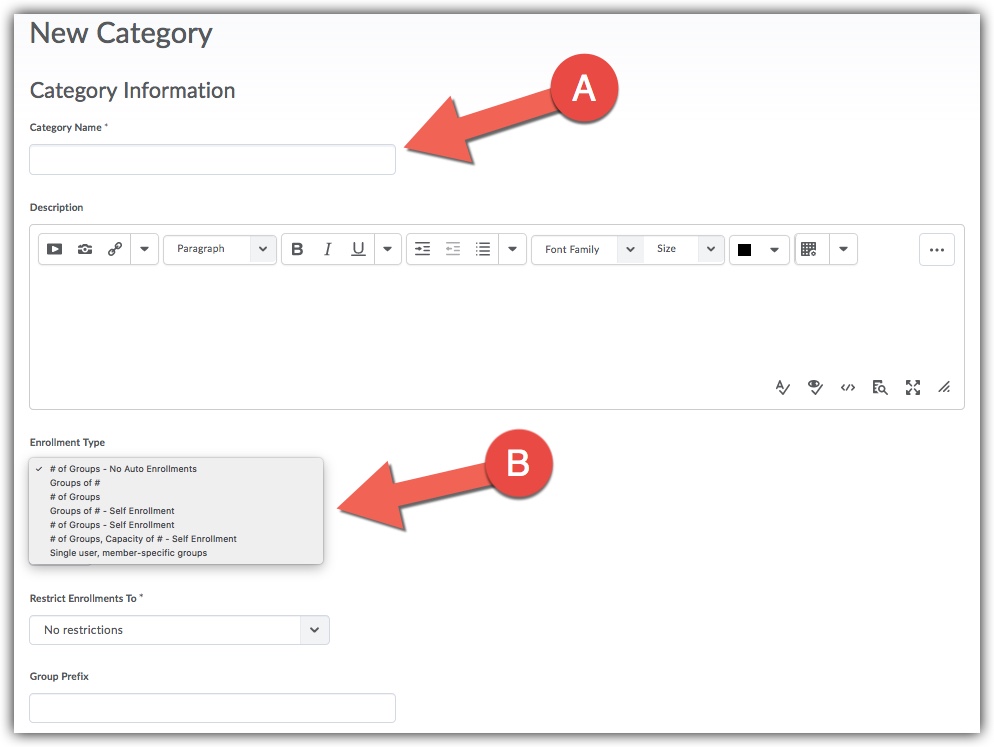
4. On the next page you will title the group category. Then select the drop-down under Enrollment Type. There are three self-enrollment options. Select the option you would like and enter the "groups of # " and/or "# of groups" information.
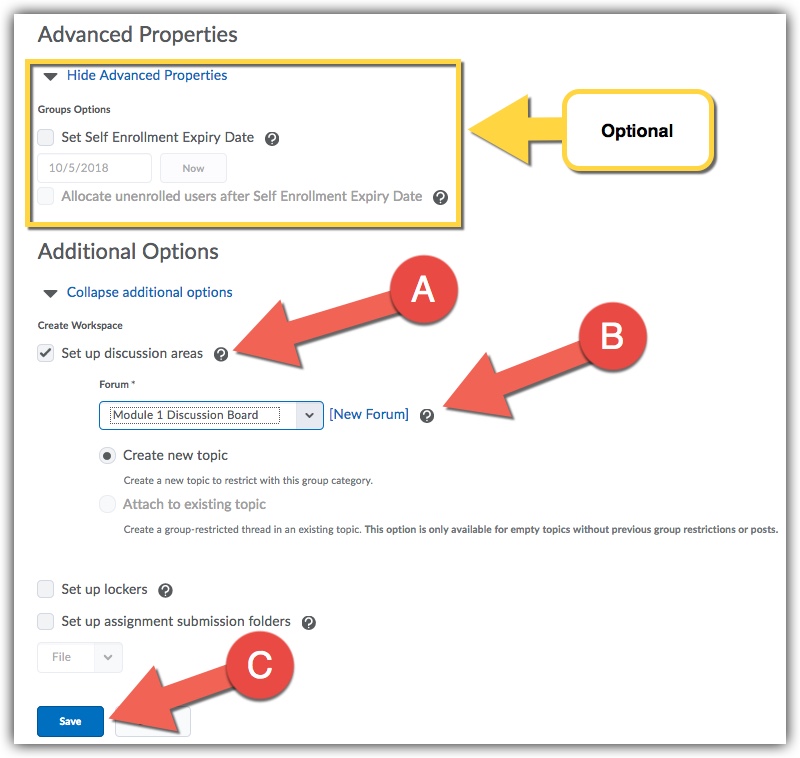
5. Scroll down to the section titled Advanced Properties. If you would like you can set a expiry date for self-enrollment and can have students be randomly allocated to a group after the date has past. To set up the discussion boards scroll down to the section titled Additional Options. Check the box Set up discussion areas. Select an existing forum or create a new forum. Next select Save.
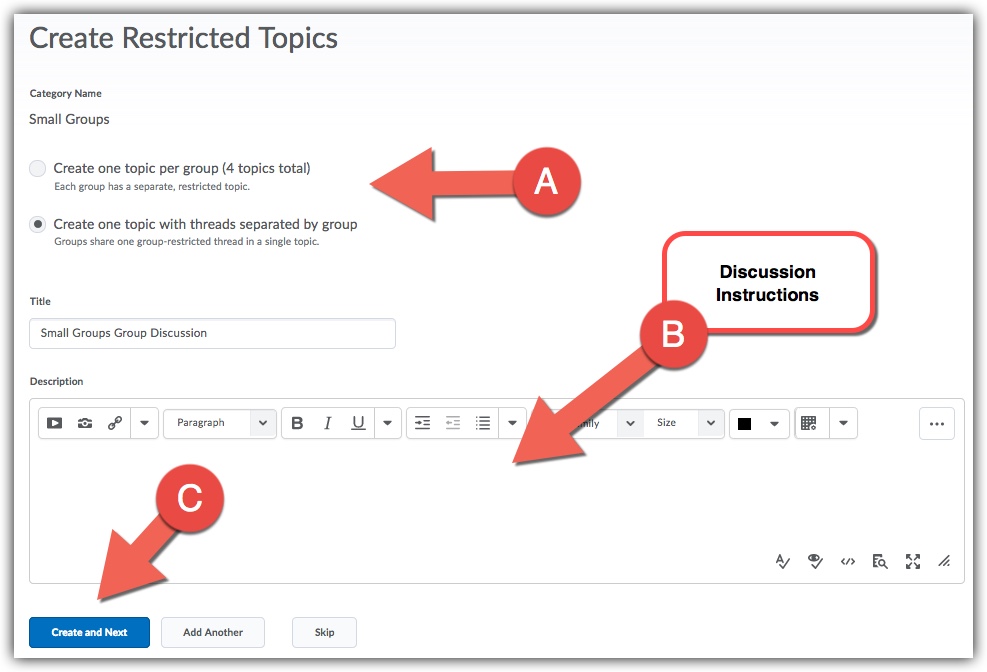
6.On the next page you will set up your discussion board. You have the option of having a separate discussion topic for each group or have one topic with separate threads. NOTE: If you pick the second option this will allow you to connect one grade item to your group discussion boards. Next select Create and Next.
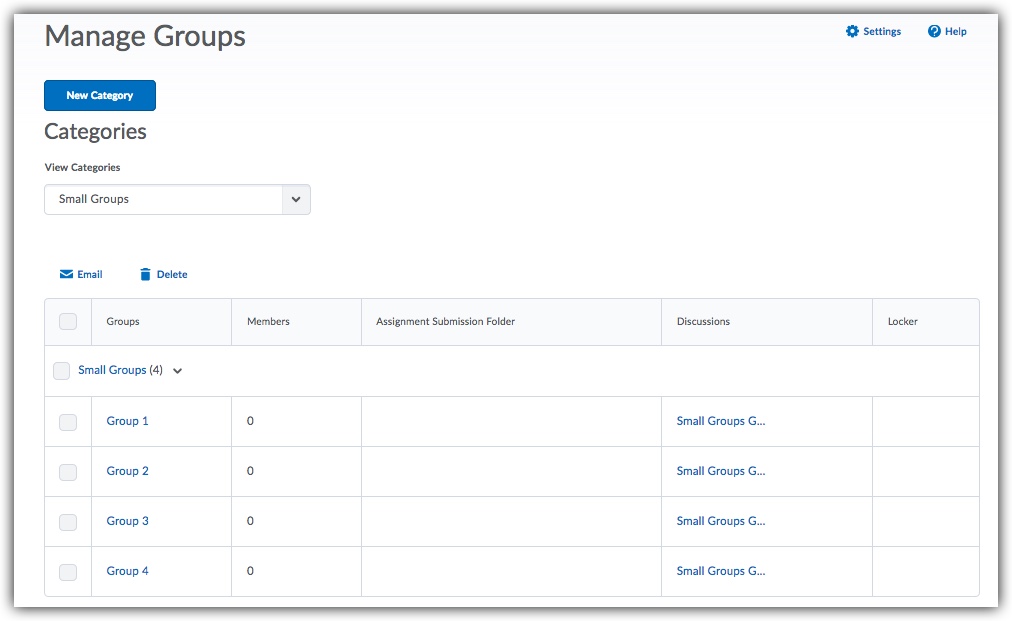
7. On the next screens select Done and Save until you are back on the main page. Your self-enrollment groups and discussion board are now created. Students will now need to enroll in the groups.
