How to Make a Website (DW)/Step 2 - Set-up Site/Mac Instructions
Before you set up a new site make sure that the web server you wish to connect to has been mapped as a drive to your computer.
For the Mac you will go to the Go tab located in the upper left menu panel. Go to Go>Connect to Server.

You will see this dialog box. Pick the smb://webstore.winona.edu... option.

You should see a Blue Hard drive located on you desktop that has you WSU ID under it.

The drives you have correspond to DFS network paths will include this one for your Student Web:
- W(webstore) Drive = \\winona.edu\dfs\students\web_studentwebs
- Once it shows up on your desktop click on the W drive and create a folder inside it. This will be the folder that your Dw website will be placed in when you are ready to put it on the web.
- URGENT! When naming you folder do not add spaces. keep it short and simple.
- Once it shows up on your desktop click on the W drive and create a folder inside it. This will be the folder that your Dw website will be placed in when you are ready to put it on the web.
- NOTE every time you publish to your website make sure you are connected to the WSU network. If your are off-campus, you will need to login via Cisco VPN.
To access and map a Student Club web site, see Student Clubs.
Define a Site
In Dreamweaver the opening menu offers an option to Define a New Site.

Or using the top menu click on Site > Manage Sites. Here you will find a listing of all your sites. If you already have one you started for your website click on it and click edit and verify your settings. Otherwise click New Site.

Follow these Steps for Setting up a New Site for the PC in Dreamweaver
- 1st... Name Your Site.
- This Site Name should also be used to name the folder where you will keep your site on your computer, just for the ease of identification.

- 2nd... Click the Browse Folder.
- Click on the Browse Folder then find a spot on your computer that is easy and convienent for you to locate anytime. If you have not created a folder for you website then do so.
- Do not save your Local Site Folder location in the W Drive for security reasons and just in case you make more than one website.
- 3rd... Click on Server Tab right below the Site Tab
- click on the bold plus sign
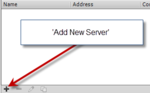 a window should appear like this:
 - name your site in the Server Name tab
- select Local/Network in the Connect using tab
- Click on the Browse Folder for the Server Folder tab
- click on the bold plus sign


- locate the W drive in the Finder
- select the folder saved inside the W drive that is designated for your website.

After you save your settings the window should disappear and you should see your site folder in the bottom right corner of the DreamWeaver.
