Difference between revisions of "Microsoft Office Lens"
| Line 8: | Line 8: | ||
1.'''Open App Store''' and '''search for Microsoft Lens''' or click on this [https://apps.apple.com/us/app/office-lens/id975925059 Apple's App Store] link. | 1.'''Open App Store''' and '''search for Microsoft Lens''' or click on this [https://apps.apple.com/us/app/office-lens/id975925059 Apple's App Store] link. | ||
| − | 2.Click on '''GET''' as shown in the image. | + | 2.Click on '''GET''' as shown in the image below. |
[[File:Install.png|400px]] | [[File:Install.png|400px]] | ||
Revision as of 19:54, 20 March 2020
| REVISION IN PROGRESS: This article contains useful information, but is being revised to reflect recent updates. Direct questions to TLT (tlt@winona.edu). |
Use Microsoft Lens on your smartphone or PC to take pictures of documents (e.g., handwritten assignments, homework), clean up the image to make it more readable, and send it to your your instructors.
Install Lens on your phone
Search for the Microsoft Office Lens app on Apple's App Store or Google Play and install it as you would any app.
Installing on Iphone
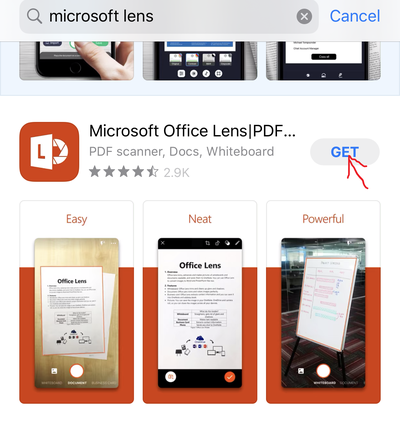
1.Open App Store and search for Microsoft Lens or click on this Apple's App Store link.
2.Click on GET as shown in the image below.
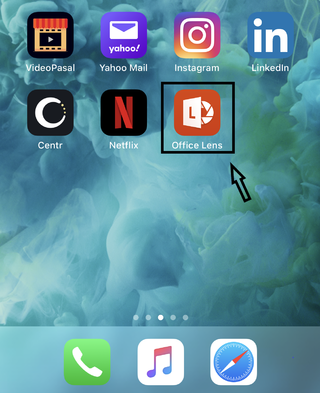
3.After installation is completed you can see the Office Lens icon on your home screen. Click on the Office Lens icon to open it as shown in the image below.
Installing on Android
How To Use Lens To Scan Assignments
- This Process is same for both Iphone and Android.
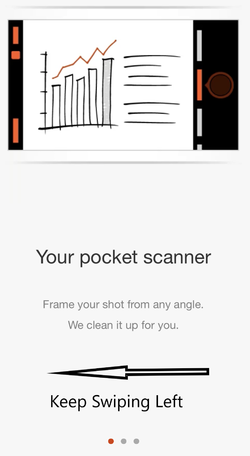
1. After you open Office Lens App you will see the following screen just for the First time of Use. You can keep swiping Left until you reach Step 2.
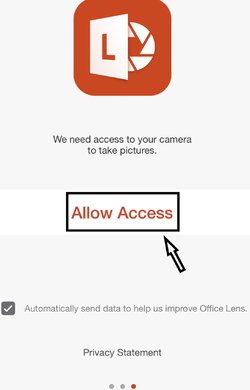
2. In Next Step, if prompts to Access Camera Click Allow Access.
- It will again ask to Allow Camera Access in Next Window too. Click OK in next window.


