Microsoft Word (PC)/Writing Papers for College
Word is your basic tool for writing papers for college.
Using it well can help you turn out papers that have been formatted correctly and have been proofed for spelling and common grammatical errors.
There are a few basic things that everyone using Word should always do.
Define Your "Normal" Style
The standard for papers in Freshman English should serve you for just about all your needs, at least in far as the basic text is concerned. MLA conventions which have been adopted by the WSU English Department require that your papers meet these basics:
- Font is a serif font like Times New Roman at 12 points
- Lines are double-spaced
- Top and bottom, left and right margins are one inch
- First-lines of paragraph are indented 1/2 inch
- Text is aligned to the left
These are also the "basics" for the APA conventions (adopted generally by social sciences).
See MLA versus APA Conventions for details of differences. You may want to set different styles for these different conventions. For example, Quote (MLA) or Quote (APA).
When Word opens a new document it automatically starts up with the "normal" style.


Here is how you can modify the "normal" style to the MLA/APA basic requirements:
First: Using the Home Menu choose the Style Panel.
- Step 1: Click on the pull down button to open the style menu.
- Step 2: Select "Normal"
- Step 3: Click on the icon for "Manage Style."
Next: In Style Dialog, choose the tab "Set Defaults."
- Step 4: Change the font to what you wish. It should be a serif font See below for examples.
- Step 5: Set font size to 12.
- Step 6: Choose "First-line Indent." It will automatically set to .5 inch.
- Step 7: Choose "Double" spaced line.
- Step 8: Click on radio button for "New Documents Based on this Template."
Click Okay to close this. And you are done!!
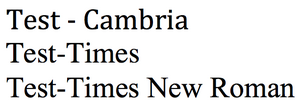 <---Here is a sample of how three different serif fonts look. You can use any of these or others which are serif.

Editing a Style for Long Quotes
The rules for indenting "long quotes" differ between MLA and APA conventions.
- MLA requires any quote more than 3 lines of verse or 4 lines of prose should be indented by 1 inch.
- APA requires any quote more than 40 words long should be indented by 1/2 inch.
The following sentence(s), if still inside the paragraph, will then be flush to the left with no indentation.
- Note: To show your "Ruler" above your page, click on the tab for View and locate the "Show/Hide" menu. Put a check in the box for "Ruler."
You can make these indentation click on the Tab for "Page Layout" and locate the menu for "Indent."
- Make sure that the long quote starts out as a New Paragraph.
- With your cursor at the head of the line you wish to indent, first use your Backspace key to remove the first-line indentation.
- Then, change left indent to 1 inch or .5 (1/2) inch--the example shown is set at 1 inch.

- Note: this style change may affect the next paragraph unless you revert to Normal Style. Use your Home tab to select the menu for Styles and, select Normal to return to it. But if the long quote is in the middle of the previous paragraph, make sure you start this following sentence(s) flushed left with no indentation. You can use your "Backspace" key at the front of the sentence to remove the indentation.
Editing a Style for a Bibliography or Works Cited

The rules for Bibliography indentation in MLA and APA conventions are the same, although the actual format for the citation is different.
Make sure you use the correct bibliographic citation for the correct convention you are using. See: MLA versus APA Conventions.
Both require "hanging lines" where the second line and lines thereafter are indented by 1/2 inch.
- Note: To show your "Ruler" above your page, click on the tab for View and locate the "Show/Hide" menu. Put a check in the box for "Ruler."
You can make these indentation click on the Tab for "Page Layout" and locate the menu for "Indent."
- Make sure that the citation line starts out as a New Paragraph.
- With your cursor at the head of the line you wish to set up for a hanging-line, first use your Backspace key to remove the first-line indentation. Or zero out the indent in the menu.
- Then, click on the paragraph menu pull-down to open the paragraph dialog.
- In the paragraph dialog, look for Indentation > Special and select "Hanging".
- It should set to 0.5 (1/2 inch) automatically, or otherwise you can calibrate it yourself.
- Note: this style change should affect the next paragraph unless you revert to Normal Style. So you can continue adding to your Bibliography this way.
Alphabetizing Your Bibliography
You can alphabetize your bibliography or any list of things by using the "Sort" command on your menu. Go to the Home Tab on your menu. Look for the "Sort" command on your "Paragraph" panel of options.
To use this:
- First: select the items to be listed. They should be all "highlighted."
- Then: select the Sort Command.
- Then the dialog box will open and by default it should "sort" paragraphs in ascending (alphabetical) order.
That is all there is to it. You will need to repeat it if you add items to the list out of alphabetical order.

Putting Page Numbers on the Page

Both APA and MLA require page numbers to be inserted on the TOP or Header of every page. Put it on the right-hand side.
Fortunately Word will automate this for you.
With MLA you should include your last name, next to the page number.
Here is how to do it:
- Choose the Insert Tab on the menu and look for the "Header & Footer" items.
- Select Page Numbers.
- Select the option for Header Page numbers... Right corner....
The page numbers will be automatically inserted on the first page.
They will automatically start at number 1.
They are automatically in Arabic number form.
Spell Checking and Grammar Checking


The default configuration for Word will automatically check spelling and grammar as you type.
By default it checks only technical rules of grammar for English. This includes, in addition to spelling, capitalization, negation, misused words, commonly confused words, possessives, fragments and run-ons, questions, use of plurals, agreement in plurals and subject-verbs, relative clauses (e.g, that vs. which), and punctuation.
If you want to add a more rigorous check, you can choose various "style" elements to be checked as well. Some of these style rules are perhaps unnecessarily rigorous for standard English, but you cannot go wrong to use them.
To modify your Grammar and Spell Checker defaults:
- 1. Locate your Word Options under the Office menu on the menu bar.
- 2. Select the preferences for "Proofing."
- 3. You can change the automatic checking here. For example, leave automatic spell checker on but turn off the automatic grammar checker, then set the grammar checker to run when you run the spell checker at the end of the paper.
- 4. You can change the rules to apply to your grammar checking by opening the dialog for "Settings." Here you can select the optional rules you want. Or turn off specific rules.
Other Resources
See other help pages:
- Training on Word 2007 from Microsoft: [http://office.microsoft.com/en-us/training/HA102155661033.aspx Click Here