Multi-factor authentication for Office 365
About this article
This article includes the steps involved in configuring multi-factor authentication (MFA) for Microsoft Office 365. It is intended for all WSU students, faculty, and staff.
What's Office 365 Multi-Factor Authentication (MFA)?
In order to better protect you, your data, and our campus network from increasingly sophisticated phishing and other social engineering attacks, Winona State University will be implementing an Office 365 (O365) security feature this fall called Multi Factor Authentication (MFA). Once enabled, your password alone (which someone could have stolen from you) will not be enough to prove your true identity when you log into O365. In addition to your username and password, O365 will ask for more proof, analogous to a special knock or a secret handshake, before it lets you in the door. You can choose from several MFA options and can use multiple options Keep in mind that some of these options can be used at the same time to give you additional flexibility. You should also know that MFA doesn't request your special handshake every time you log in from your office or other "trusted" computers, only when it detects something has changed or your account is being used someplace it hasn't yet seen.
You can choose from several options The type of handshake or knock you choose can have an impact on how and where your account can be used, so we want you to be well-informed before you decide what is best for you.
Setup Trust Account
If you see other choices you may have set something up previously. Office 365 personal or security and privacy settings contain some of this info so it may have been added previously.
1. Go to https://account.activedirectory.windowsazure.com/Proofup.aspx
2. Sign into your account and setup MFA
Our Recommendations
- Provided you have a smart phone, we highly recommend using the Notify Me through app using the Microsoft Authenticator app as your #1 choice; followed by a backup text. This notification process makes it super easy when your account is finally tripped.
- A regular cell phone without smart capabilities use text
- If no cell phone your options are to use your office phone or use verification code from app on a university laptop.
Setup Process
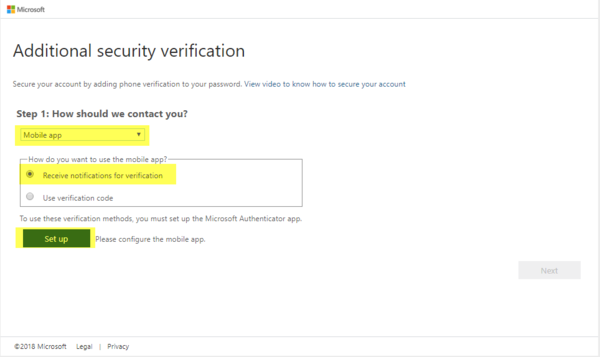
- Click on Setup
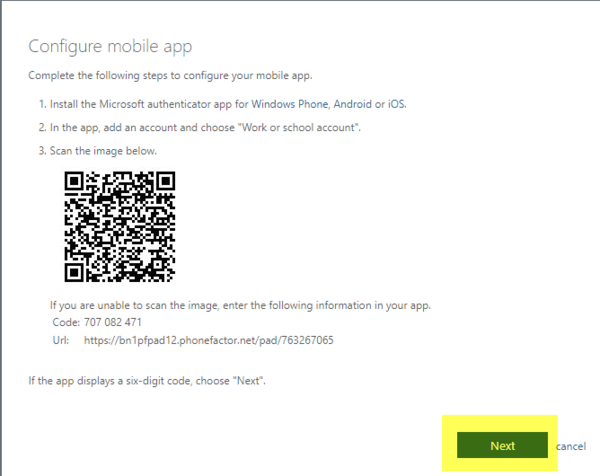
- On the next screen read through the instructions, install the app and click on Next
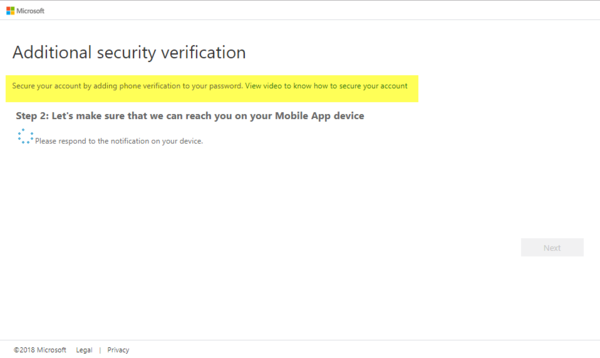
- A message will be sent to you phone
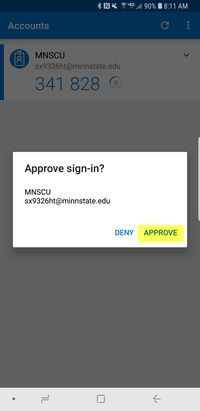
- When you get the verification message click on Approve
Activation
- Activation consists of scheduling your account to have Multifactor
- You will get a popup - Within an hour you will need to validate your account
- Type in your StarID password once and click approve (or enter text option)


