Photoshop/Making Animated GIF
To Use an Animated Gif for a Slide Show for a Web
You can create an animated GIF that basically rotates through a series of images within a single file. The "rotating" images are created from multiple "layers" in a Photoshop file. Then the viewing of the layers are animated to alternate between them.
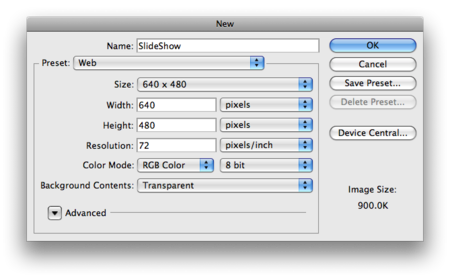
Here are the steps for creating an animation of four different images which have been scaled to a preset web canvas of 640 x 480.
Steps to Create Layers
- Use menu for File>New. See Dialog to the right with preset web design.
NOTE: Background is set to transparent. - Use menu File>Place to select a photo or other image file and place it on the canvas in the first layer. Press ENTER to accept it.
NOTE: you may need to resize or crop your images to fit the canvas. - Use menu Layer>New to create a new layer in an empty canvas.
- Repeat File>Place with the new layer selected.
- Repeat the process of New Layer and Place until you have as many images as you wish to rotate in your animated GIF.
Steps to Animate Layers
- Use menu to open Window>Animation.
NOTE: The opening frame will show the topmost visible layer, which will be the last image "placed" onto the file. - Set the image duration in the first frame at 5 or 10 seconds as the default for all frames. You can change each individual frame there after.
- Duplicate the frame.
- With the new frame selected, make the topmost layer invisible so that the next image (layer) comes to view in the frame.
- Duplicate the frame and repeat the process of revealing the next image (layer) until you have come to the last image (frame).
Tweening
Selecting a layer, and clicking on the tweening option will offer you a dialog in which you can choose to create a transition between the selected frame and the one before it or the one after it. By default it will create a 5 frame sequence of gradually fading from one to the other. There are variations that can be made to this.
- NOTE: you will want to set the image duration of these "tweened" frames to something like .1 or .2 seconds to enhance the effect.
Steps to Export to a GIF File
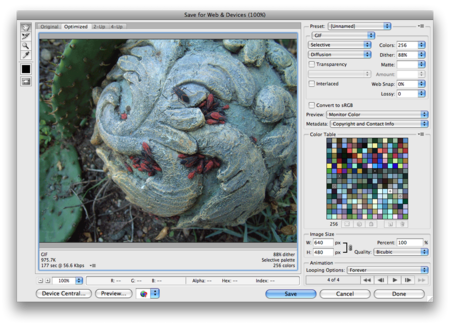
- Use the menu File>Save for Web & Devices...
- In the dialog use a preset for GIF such as 128 colors dithered, or set to 256 colors. Only GIF will animate.
- Set the animation for "Forever" if it is not so set.
Here is the resulting animated GIF in a scaled down image.
Other Resources


