Preparing Your Mac For VMware Fusion
Intended Audience
This article is intended for all students, faculty, and staff participating in the e-Warrior Digital Life and Learning Program, who lease a Mac laptop, and who are interested in running VMware Fusion to access Windows applications.
Overview
There are two major steps to this process: installing VMware Fusion and installing Windows 7. All students and employees leasing a WSU Mac laptop can complete the VMware Fusion install themselves. This article walks you through this first step. Contact the Technical Support Center (457-5240 #1; techsupport@winona.edu) if you have any problems or questions. The second step, installing Windows 7, requires assistance. Students must register for a scheduled workshop to complete this step. Faculty and staff should contact TLT (457-5240 #3; tlt@winona.edu) to make an appointment.
Special Instructions for Students
You must complete the VMware Fusion install [1] prior to attending a workshop to complete the installation. You will need to show your printed receipt when you sign up for a workshop.
Installing VMware Fusion
Step One: Get a VMware Fusion License
Please make sure you are using your network cable to be wired into the network on campus when doing this.
- Make sure to backup your computer.
- Go to http://winonastate.onthehub.com
- Click on "Sign in" in the upper right hand corner of the window. Log in using your WSU username/password
- Click on "Students" or "Faculty/Staff"
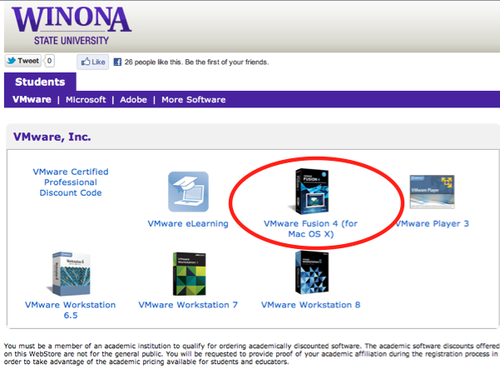
- In the purple toolbar across the top of the page, click on "VMware"
- Click on "VMware Fusion 4 (for Mac OS X)"
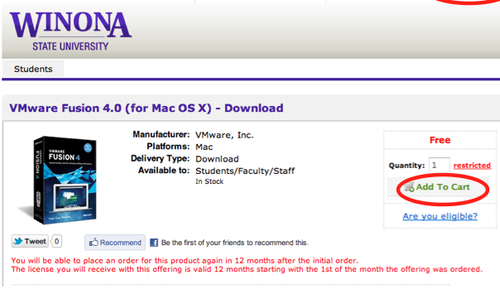
- Click on "Add to Cart"
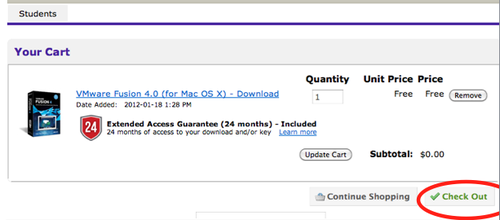
- Click on "Checkout"
- Scroll to the bottom of the license and click on "I Accept"
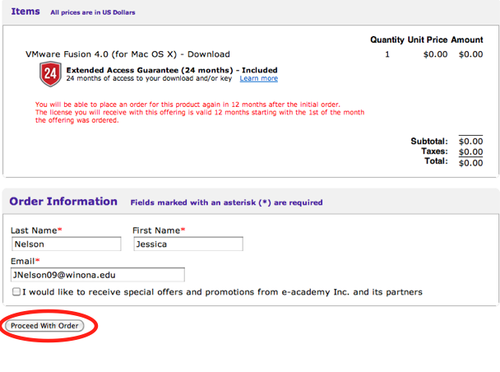
- Click on "Proceed with Order"
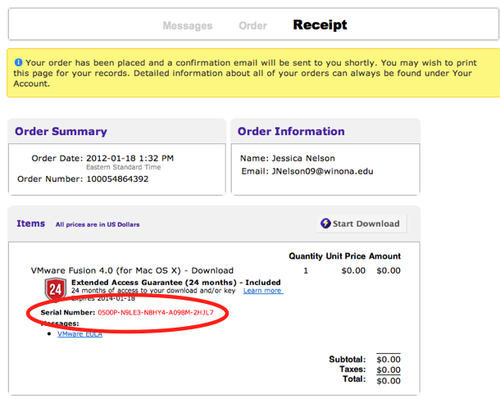
You should receive a receipt in your email that looks like this:
- Attention Students: Print out the receipt. You will need this to sign up for a workshop.
- You should also get an email confirming this transaction
Step Two: Download the VMware Fusion Application
Option 1: Download from Software Additions (Recommended)
Note: Use this option only if you are on-campus. If you are off-campus, you must use Option 2.
- Use your purple Ethernet cord to connect to the WSU network
- Open Software Additions (found under Applications)
- Select "VMware Fusion 4.0" and click on "Install Software"
Option 2: Download from the Internet
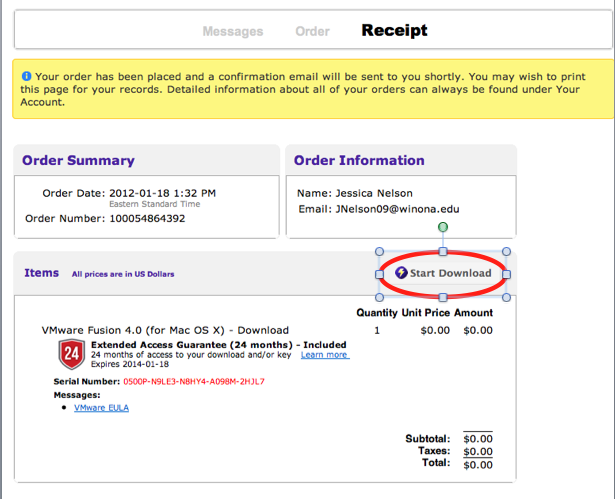
- From the receipt you received through email, look for the "Items" section and click on "Download Options."
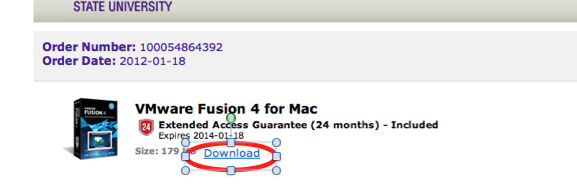
- Click on "VMware Fusion 4.0" to start the download
Step Three: Install the VMware Fusion Application
- Open the VMware Fusion Installer.
- If you downloaded Fusion from the Internet, the installer should be in your "Downloads" folder.
- If you downloaded Fusion from Software Additions, the installer should start automatically.
- Follow the onscreen instructions.
- You will be prompted to enter your serial number. Enter the serial number as found on your receipt.
Step Four: Schedule Windows 7 Installation
Students
- Bring your printed receipt to the Technical Support Center Front Desk (Somsen 207)to sign up for a workshop. You will not be allowed to sign up for a workshop without this.
- You will also need to bring the Serial Number to the workshop. We cannot do the install without it.
- You must have at least 20 GB of free space on your laptop before we can do the install. Please check this before you come to the workshop.
- Current Boot Camp Users: You will need to go to Walk-In and have Boot Camp removed before you can attend the session. Please do this before your workshop's scheduled time.
Faculty and Staff
- If you have Boot Camp installed, go to the Technical Support Center to have it removed.
- Contact TLT to make an appointment to install Windows 7. You will need at least 20 GB of free hard drive space. Contact TLT if you have questions.
