Difference between revisions of "Draft:Skype for Business/Lync"
UGhazanfar14 (talk | contribs) |
UGhazanfar14 (talk | contribs) |
||
| Line 1: | Line 1: | ||
| − | + | With the conversion to StarID, the method for signing in to use Lync has changed. Follow these instruction to sign into Skype for Business/Lync. | |
| − | |||
| − | With the conversion to StarID, the method for signing in to use Lync has changed. | ||
==Mac== | ==Mac== | ||
| Line 9: | Line 7: | ||
1. Open the Lync application. | 1. Open the Lync application. | ||
| − | 2. If the “License Agreement” pops up, click “Accept”. | + | 2. If the “License Agreement” pops up, click '''“Accept”'''. |
| − | [[File:MaclyncskypePicture3.png| | + | [[File:MaclyncskypePicture3.png|275px]] |
3. If it asks you to make Lync your default application for Telephone calls, click “Use Lync”. | 3. If it asks you to make Lync your default application for Telephone calls, click “Use Lync”. | ||
| Line 17: | Line 15: | ||
[[File:MaclyncskypePicture2.png|350px]] | [[File:MaclyncskypePicture2.png|350px]] | ||
| − | 4. On the Login in screen, type in your regular email address in “Email Address” i.e. your friendly email address e.g. jsmith16winona.edu. In “Username” type in your StarID followed by “@winona.edu” e.g. ab1234cd@winona.edu. Type in your password in the “Password” field. | + | 4. On the Login in screen, type in your regular email address in “Email Address” i.e. your friendly email address e.g. '''jsmith16winona.edu'''. In “Username” type in your StarID followed by “@winona.edu” e.g. '''ab1234cd@winona.edu'''. Type in your password in the “Password” field. |
| − | [[File:MaclyncskypePicture3.png| | + | [[File:MaclyncskypePicture3.png|275px]] |
5. Click “Sign in”. | 5. Click “Sign in”. | ||
| Line 31: | Line 29: | ||
[[File:PclyncskypePicture1.png|350px]] | [[File:PclyncskypePicture1.png|350px]] | ||
| − | 2. Click on “Recommended Settings” and then click “Accept”. | + | 2. Click on “Recommended Settings” and then click '''“Accept”'''. |
[[File:PclyncskypePicture2.png|350px]] | [[File:PclyncskypePicture2.png|350px]] | ||
| Line 39: | Line 37: | ||
[[File:PclyncskypePicture3.png|350px]] | [[File:PclyncskypePicture3.png|350px]] | ||
| − | 4. | + | 4. When the User Account Control shows up, click on '''“Yes”'''. |
[[File:PclyncskypePicture4.png|350px]] | [[File:PclyncskypePicture4.png|350px]] | ||
| Line 47: | Line 45: | ||
[[File:PclyncskypePicture5.png|350px]] | [[File:PclyncskypePicture5.png|350px]] | ||
| − | 6. In Username, put in your StarID followed by “@winona.edu” and in the Password field put in your password. | + | 6. In Username, put in your StarID followed by “@winona.edu” e.g. '''ab1234cd@winona.edu''' and in the Password field put in your password. |
[[File:PclyncskypePicture6.png|350px]] | [[File:PclyncskypePicture6.png|350px]] | ||
Revision as of 16:21, 5 August 2016
With the conversion to StarID, the method for signing in to use Lync has changed. Follow these instruction to sign into Skype for Business/Lync.
Mac
To sign in with a Mac into Lync, follow these instructions:
1. Open the Lync application.
2. If the “License Agreement” pops up, click “Accept”.
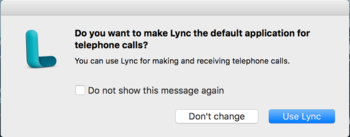
3. If it asks you to make Lync your default application for Telephone calls, click “Use Lync”.
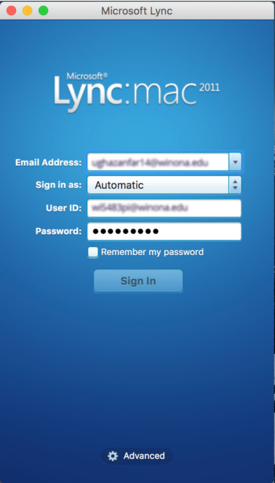
4. On the Login in screen, type in your regular email address in “Email Address” i.e. your friendly email address e.g. jsmith16winona.edu. In “Username” type in your StarID followed by “@winona.edu” e.g. ab1234cd@winona.edu. Type in your password in the “Password” field.
5. Click “Sign in”.
PC
On PC’s with the new Windows 10, the method and icons for Lync have changed. When you click on the Lync icon on your Start screen in Windows, it opens up as Skype for Business (which is just another name for Lync). To sign in and use this, follow these instructions:
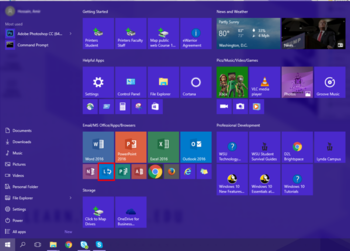
1. On your Start Menu, click on the Lync icon.
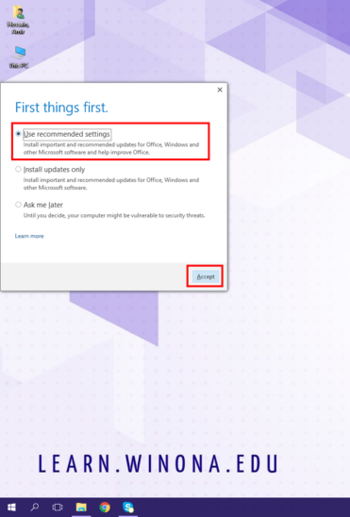
2. Click on “Recommended Settings” and then click “Accept”.
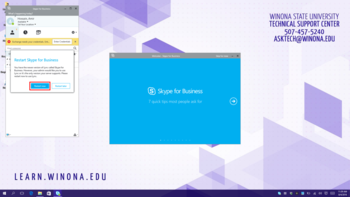
3. Click on “Restart Now”.
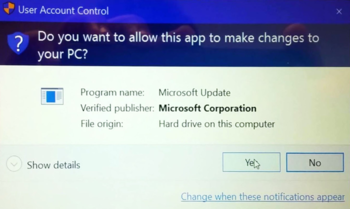
4. When the User Account Control shows up, click on “Yes”.
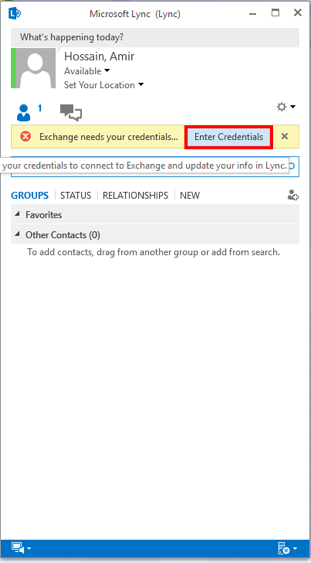
5. Once the application restarts, a yellow bar is going to appear asking for your “Exchange credentials”. Click on “Enter Credentials”
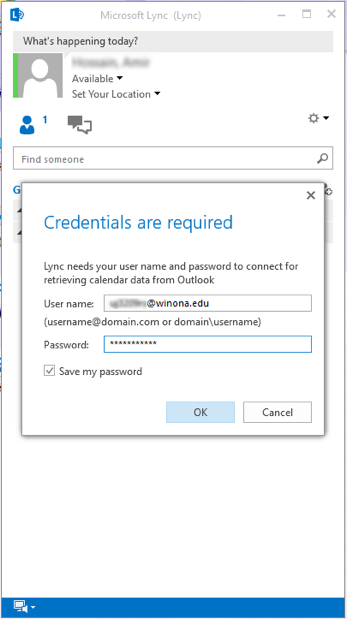
6. In Username, put in your StarID followed by “@winona.edu” e.g. ab1234cd@winona.edu and in the Password field put in your password.
