Difference between revisions of "Draft:Skype for Business/Lync"
(→PC) |
(→PC) |
||
| Line 52: | Line 52: | ||
| − | 4. A new window will pop | + | 4. A new window will pop up. Click '''Sign in with another account''' at the bottom of the window. |
[[File:SPC2.png|275px]] | [[File:SPC2.png|275px]] | ||
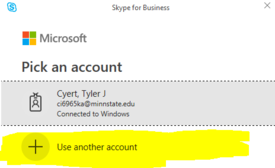
| − | 5. You may see a window titled '''Pick | + | 5. You may see a window titled '''Pick an account'''. If you don't see this please skip this step, otherwise select '''Use another account'''. |
[[File:SPC3.png|275px]] | [[File:SPC3.png|275px]] | ||
Revision as of 16:31, 13 July 2018
About this article
Skype for Business is available to all students and employees at WSU. This article mainly covers the login settings to use at WSU and links below for training on how to use the application.
With the conversion to StarID, the method for signing in to use Lync has changed. Follow these instruction to sign into Skype for Business/Lync.
Mac
To sign in with a Mac into Lync, follow these instructions:
1. Open the Skype for Business application.
2. If the “License Agreement” pops up, click “Accept”.
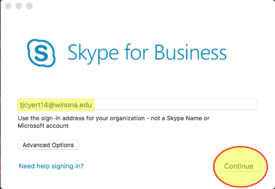
3. On the first sign in screen, type in your regular email address in “Email Address” i.e. your friendly email address e.g. jsmith16winona.edu or first.last@go.winona.edu in the text field.
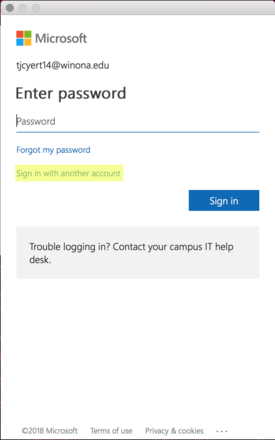
4. A new window will pop-up. Click Sign in with another account at the bottom of the window.
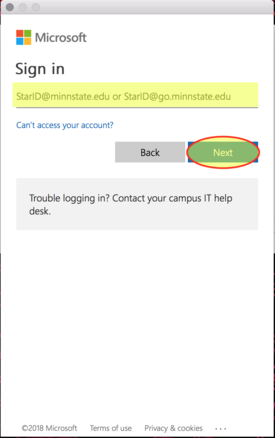
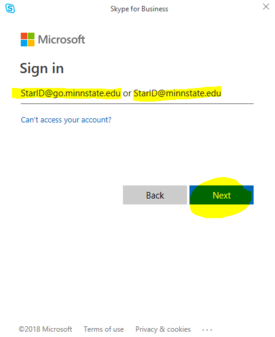
5. Now Skype should will ask for your minnstate log in.
- For Student type in your StarID followed by “@go.minnstate.edu”
- For Employee your StarID followed by “@minnstate.edu”.
4. Type in your password in the “Password” field and click Sign in.
5. Done!
PC
To sign in with a Mac into Lync, follow these instructions:
1. Click to open Skype for Business. There will be a tile on the Start menu for Skype.
2. If the “License Agreement” pops up, click “Accept”.
3. On the first sign in screen, type in your regular email address in “Email Address” i.e. your friendly email address e.g. jsmith16winona.edu or first.last@go.winona.edu in the text field. Then click Sign In.
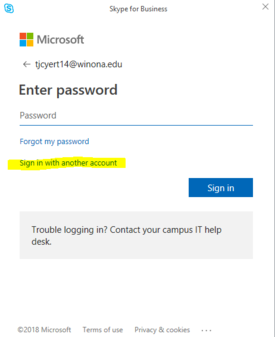
4. A new window will pop up. Click Sign in with another account at the bottom of the window.
5. You may see a window titled Pick an account. If you don't see this please skip this step, otherwise select Use another account.
6. Now Skype should will ask for your account username. Please enter your minnstate login here.
- For Student type in your StarID followed by “@go.minnstate.edu”
- For Employee your StarID followed by “@minnstate.edu”.
7. Type in your password in the "Password" field and click Sign in.
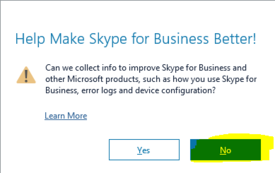
8. After the setup, you may be asked if you would like to send configuration data to Microsoft. If you see this window, you can simply select No.
8. Done!
Lynda Training
 All WSU students and employees have access to Lynda.com. Create your WSU Lynda account here
Lynda.com resources relevant to the topic on this page:

