OneDrive Sync
About This Article
This will show you how to install and setup the new OneDrive for Business OneDrive Client for Windows 10
What is the Sync capability allow you to do?
• Have the ability to create and save folders and documents to the cloud
• If students or faculty does not have access to a wireless connection they will be able to take documents with them and still be able to work.
Setting up the current version of One Drive
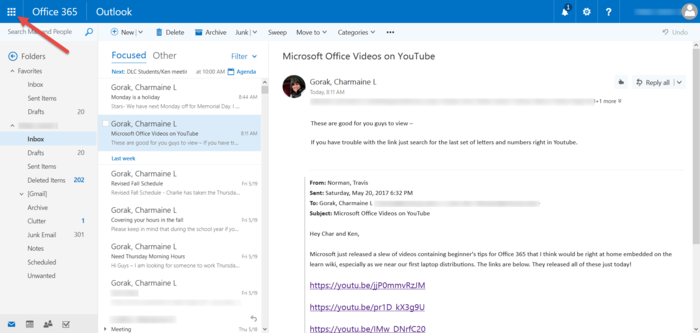
Step 1. When signed into your office 365 account click on the upper left icon
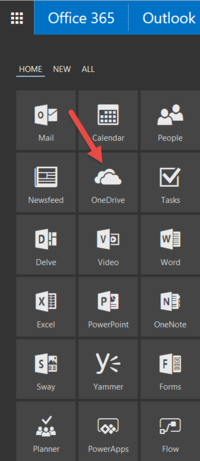
Step 2. A dropdown menu will show up and click on “OneDrive”
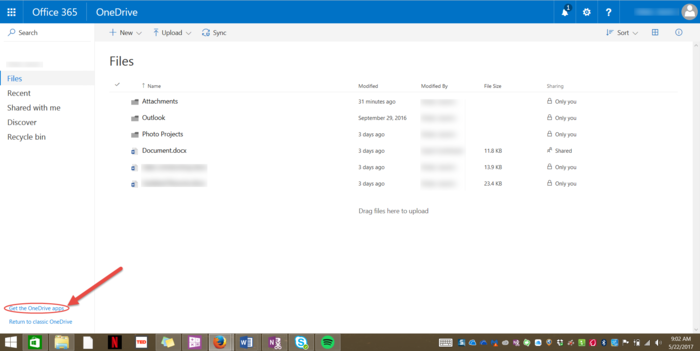
Step 3. In the lower left hand corner click on the “Get the OneDrive apps”
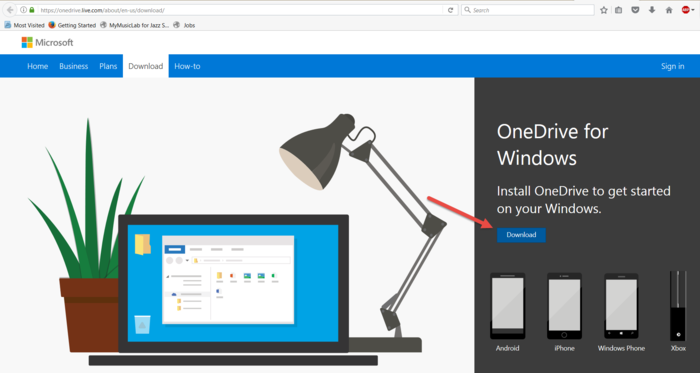
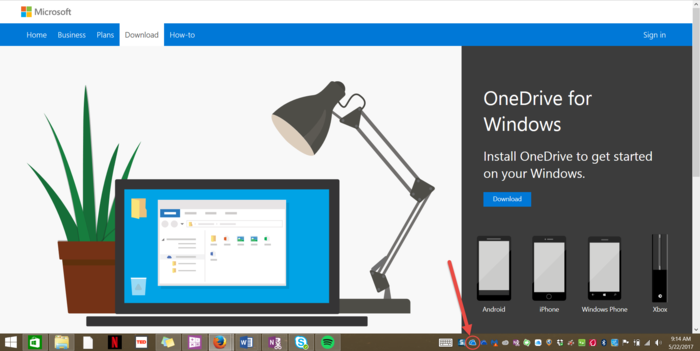
Step 4. On the right side of the page click on “Download”
a. If you have already Downloaded OneDrive and want the latest version, click “Reinstall”. A pop up will show up and you will have to enter your Star ID @winona.edu
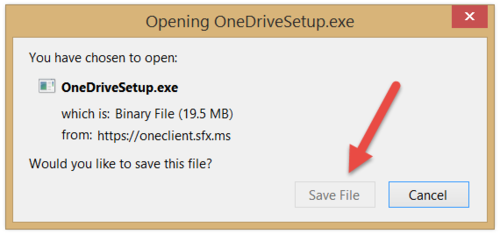
Step 5. Click on “Save File”. It will save to default location if you do not have a specific location in mind.
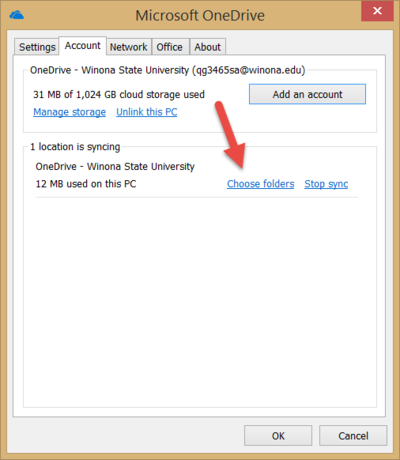
Step 6. Once the client has been setup the cloud icon in the system tray will turn blue. Right Clicking on the blue cloud to bring up a menu. Click on “Settings”.
Step 7. By clicking on the “Choose folders” option it allows you to choose which folders you wish to sync.
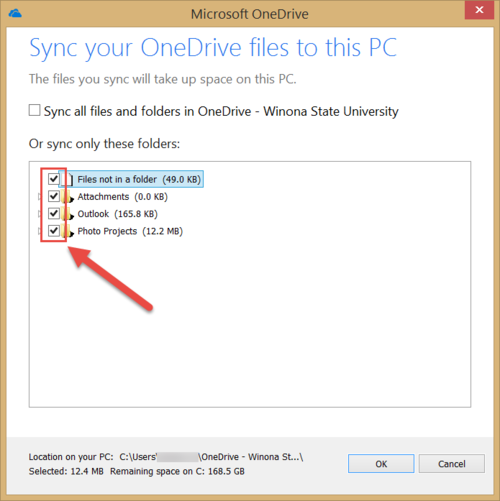
Step 8. Choose the specific folders you want to specifically have synced to the cloud so you will have access to even when you do not have an internet connection.
