Upload files to your MediaSpace account
Intended Audience
WSU instructors using Mediaspace and Desire2Learn or those interested in using this instructional management system in the future.
Overview
This article provides step by step directions for uploading media to MediaSpace and embedding this media into D2L. This article is split into two separate sections.The first section provides directions for uploading media to MediaSpace. The second section provides directions for embedding this media into D2L.
Uploading and Sharing Media from MediaSpace
The follow the steps below are designed for uploading media (i.e. video, audio, and images) into your MediaSpace. It is recommended that your video content be published at 1280x720 pixels and use the H.264 video codec at about 4000 kb/s.
Upload Media
Go to http://mediaspace.mnscu.edu. Login in with your Star ID and password.
1. In the upper right corner of your MediaSpace next to your name select the "Add New" button. Then select the "Media Upload" option from the drop-down (see Fig 1).
2. On the next screen select the blue button labeled "Choose a file to upload". You will then be prompted to browse for a video from your computer.

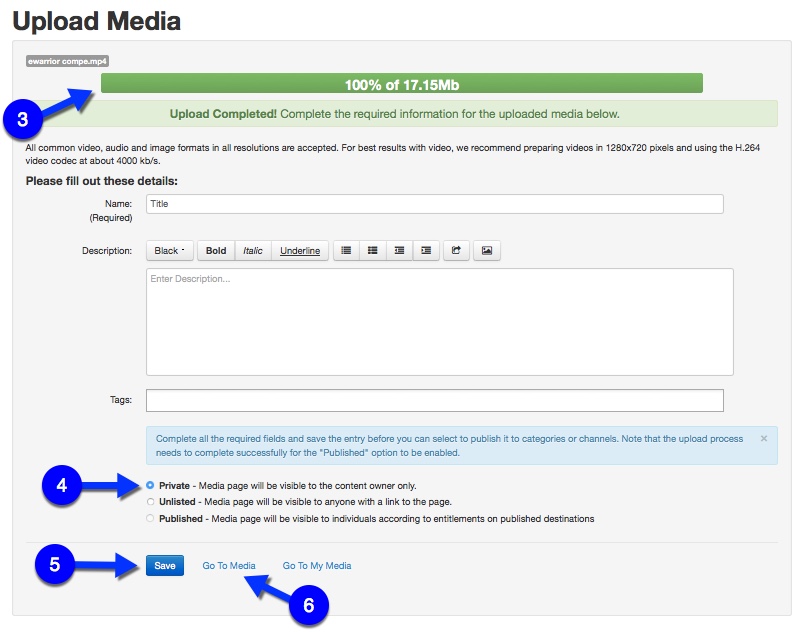
3. Once you have selected your video it will begin to upload. At the top of the screen you can see the progress of the upload. This bar will turn green when the upload is complete. This may take a few minutes depending on the size of the media.
4. Once your video is uploaded at the bottom of the page check the "Private" option
5. Select "Save"
6. Select "Go To Media"
Embedding MediaSpace Media in D2L
The process of embedding your media into D2L Brightspace can all be done now within the course. Many find it helpful to embedding media in Announcements, Content, Discussion Boards, Assessments, and even to provide feedback on a Grade Item. The process of embedding any media is the same and can be conducted by following the steps below.
Embedding Video
Log into D2L and select the course you would like to add your media. Within the course select the area you would like to add your media. For this example we will go to Content section of your course.
1. Select "Upload/Create" and select "Create a File" from the drop-down (see Fig 1).
2. Title the media you are about to embed and select the Insert Stuff button (See #2 below).
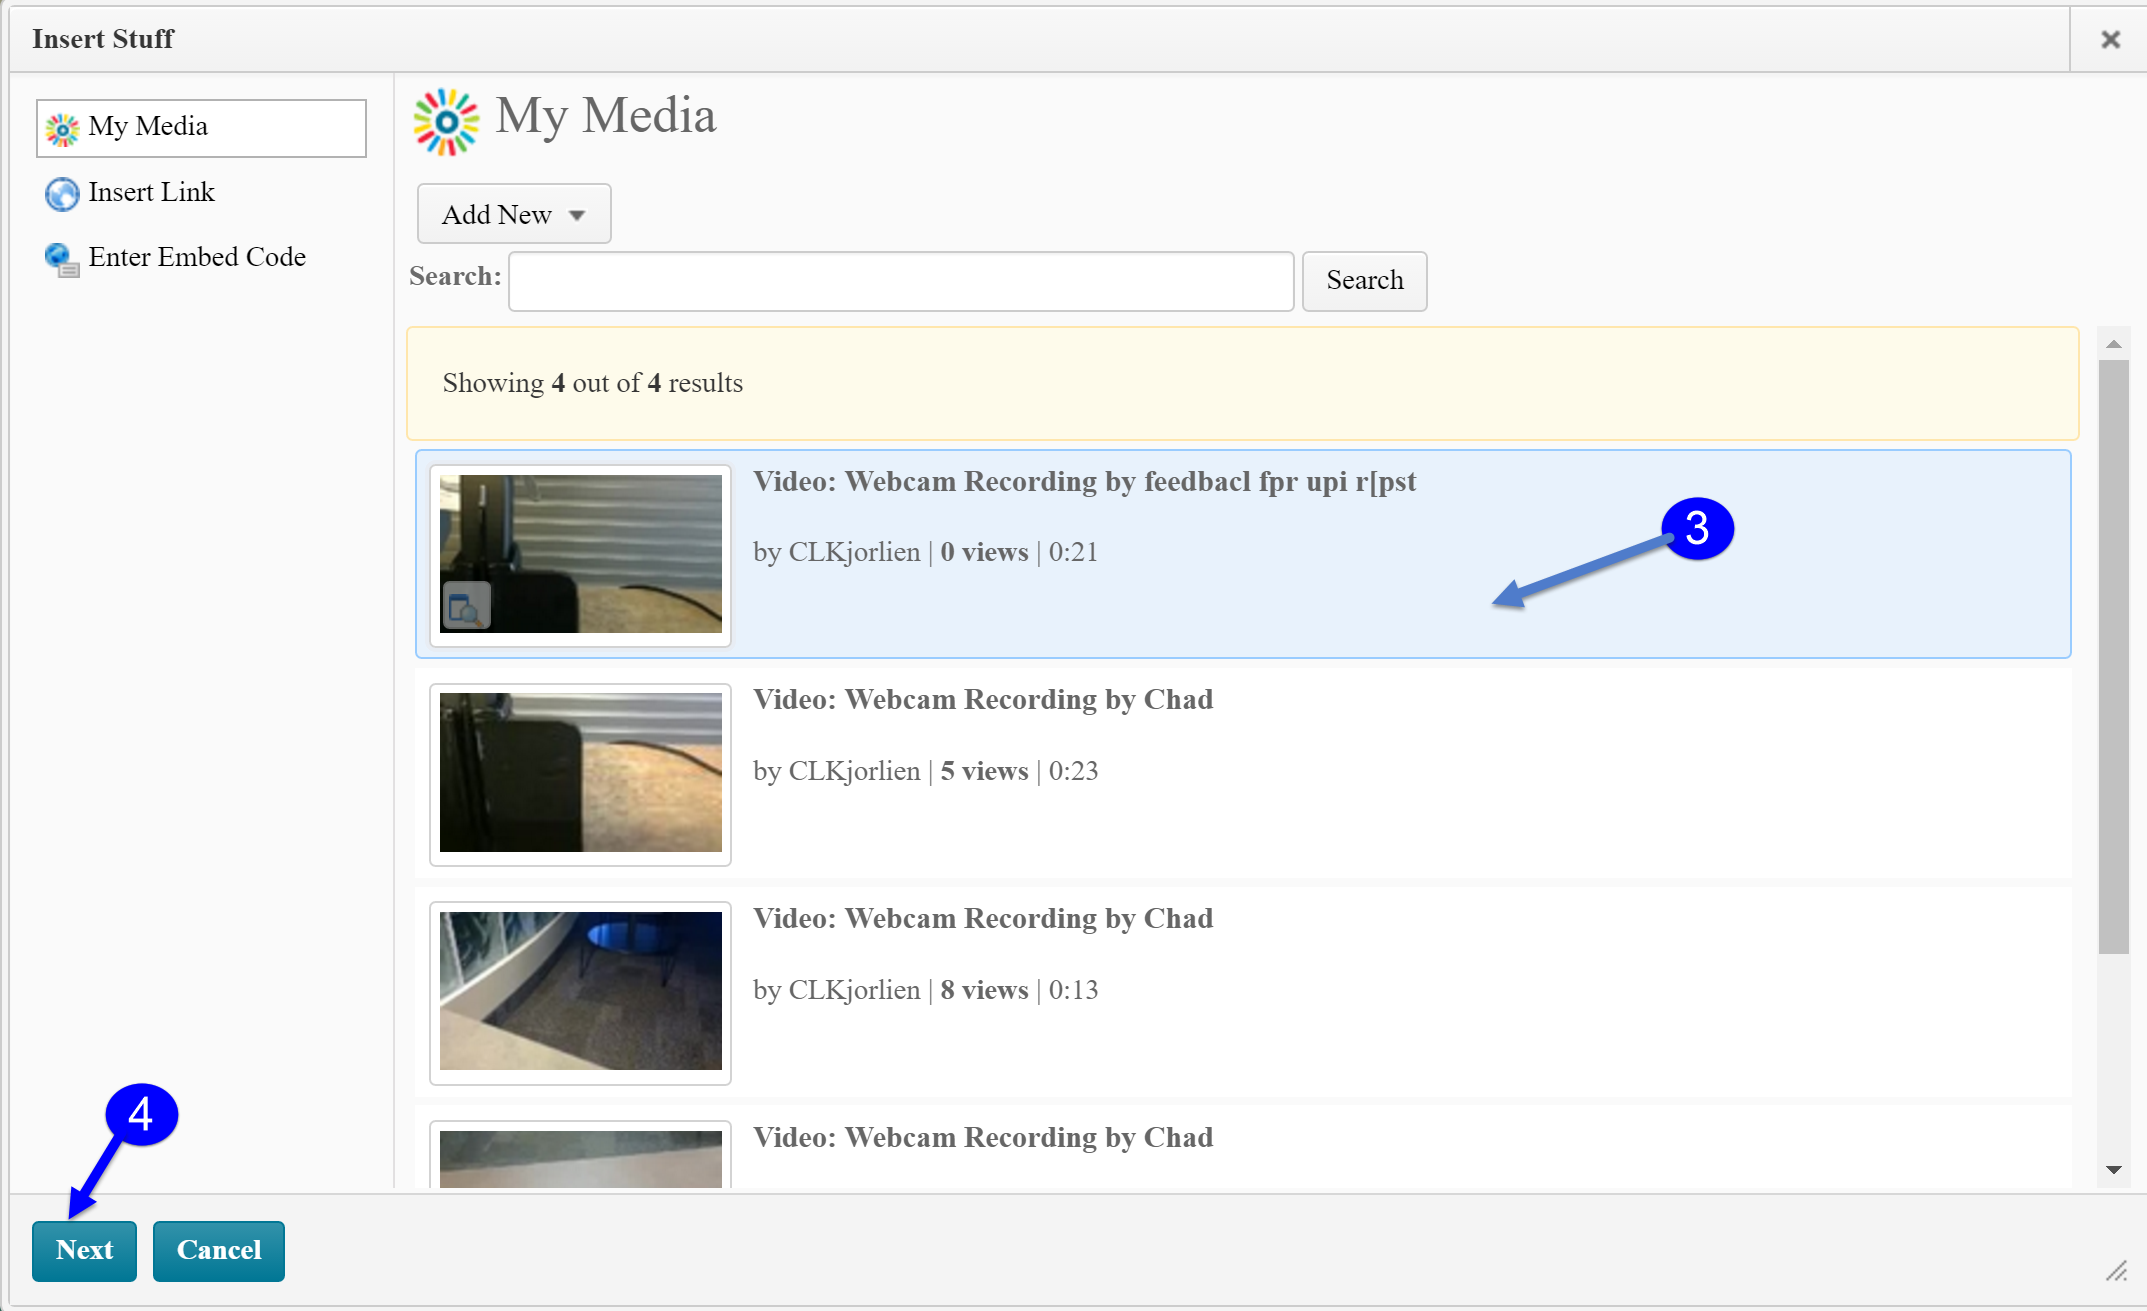
3. From Inser Stuff menu select My Media and choose the media by selecting the file as in the example below (it will be highlighted blue)

4. Select "Next", Insert, and Publish buttons and the media to be available to your class.
Related Articles


