Use a waiting room in a Zoom meeting
Use a waiting room in a Zoom meeting to control when a participant joins the main meeting room. As the meeting host, you can admit attendees one by one, or hold all attendees in the waiting room and admit them all at once. You can send all participants to the waiting room or only guests (e.g., participants who have not signed in using their StarID credentials). In an active meeting session with the waiting room enabled, you can move participants from the main meeting room to the waiting room.
Activate your Zoom account and schedule a meeting
Zoom is a web conferencing tool for scheduling, hosting, and recording online meetings. Before you can schedule a Zoom meeting, you must activate your free Minnesota State Zoom Pro account. Any Minnesota State student or employee can activate their Zoom account and host their own online meetings. When scheduling a meeting, you select various options to customize your meeting to meet your needs. Enabling a waiting room is one of those options.
Enable your meeting's waiting room
Before starting or joining your meeting, you must edit the meeting's options and enable the waiting room. This gives you the ability to use the waiting room feature in the live meeting and needs to be done for every meeting separately. To edit your meeting options, sign in to the Zoom host web portal at https://minnstate.zoom.us and select Meetings. The remaining steps differ depending on whether you are editing the settings of your Personal Meeting or another meeting session:
Your Personal Meeting
- Select the Personal Meeting Room tab to open your Personal Meeting's information page
- Select the Edit this Meeting button at the bottom of the page
- Under Meeting Options, check Enable waiting room
- Select Save
A scheduled meeting
- Select the meeting's topic from your list of meetings to open the meeting information window
- Select the Edit this Meeting button at the bottom of the page
- Under Meeting Options, check Enable waiting room
- Select Save
The waiting room experience
Once you enable the waiting room meeting option, your participants will not enter the meeting when they use the meeting link or ID. Instead, they will see an information screen indicating that they are in your meeting's waiting room and to wait for you to let them in to the meeting. The waiting room information screen can be customized to to include your own logo, title, and description.
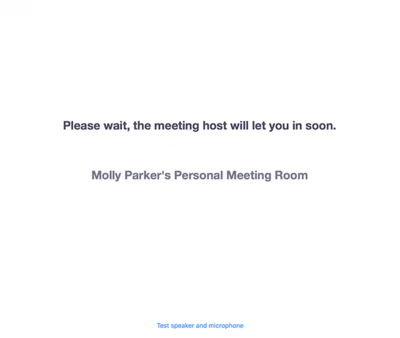
Fig 1. The waiting room information screen.

Manage the waiting room during a meeting
Turn waiting room on and off
After starting and joining the meeting as a host, turn the meeting's waiting room on and off by following the steps below:
- Select Manage Participants from the meeting toolbar
- Select More at the bottom of the Participants window and then select or deselect Put attendee in waiting room. A check will appear indicating that the waiting room is on.

Fig 1. Open your waiting room.

Admit participants
- As the meeting host, click Manage Participants.
- As participants enter the waiting room, click Admit to have the participant join the meeting.

Fig 3. Admit participant.

Send a participant to the waiting room
- As the meeting host, click Manage Participants.
- Click More next to the participant's name and choose Put in Waiting Room.

Fig 4. Select put in waiting room.

Customize your waiting room screen
- Sign in to your Zoom web portal at https://minnstate.zoom.us.
- In the navigation menu on the left, select Settings and then select In Meeting (Advanced).
- Scroll down to the Waiting Room option and move the slider to the right, turning customization on.
- Click the pencil icon below the Waiting Room option.
- Customize your waiting room screen and select Close.
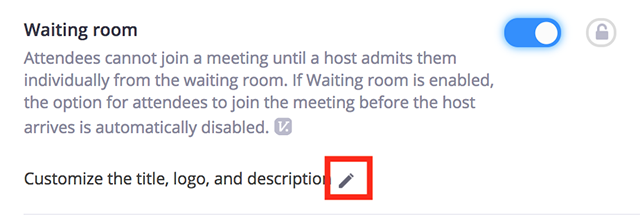
Fig 5. Select the pencil to customize your waiting room screen.
More wiki articles
Zoom training
- Zoom Help Center
- Zoom training from Linkedin Learning
- From the Zoom Help Center:
- How do I invite others to join a meeting?
- My Account (account configuration, password reset, meeting-link creation, meeting, scheduling, ...)
- Managing Video Breakout Rooms
Related Wiki Topics
- Student daily tips
- Instructor daily tips
- Draft:Article layout basic
- Send incoming Zoom Phone calls to voicemail
- Launch Zoom on startup
- Zoom Phone settings
- Zoom Phone preparation checklist
- Zoom Phone FAQ
- Zoom Phone
- Blended meetings
For a complete listing of topics, select from the category list below.