Difference between revisions of "Video Compressor"
| Line 48: | Line 48: | ||
[[Tips For Recording Video From a Tablet]] | [[Tips For Recording Video From a Tablet]] | ||
| + | |||
| + | [[Sharing Video and Photos Between Devices (Mac)]] | ||
Revision as of 17:40, 14 May 2015
About this article
This article provides an overview of the Video Compressor application. This article also includes step by step directions for compressing a video captured with a tablet. This article is intended for all audiences.
What's Video Compressor
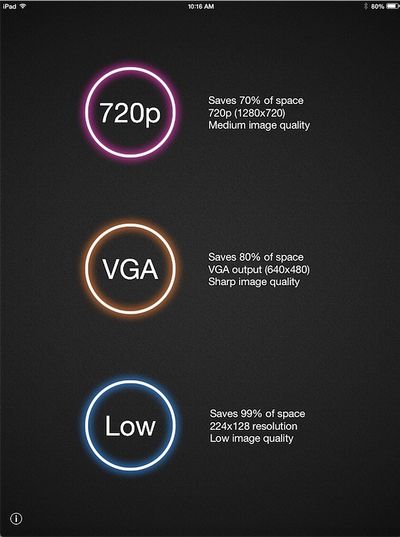
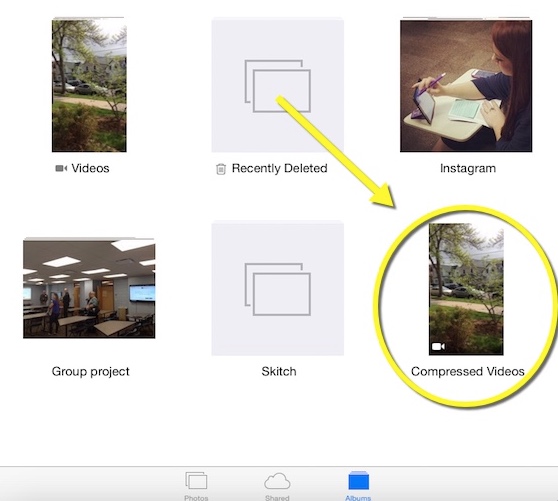
Video Compressor is an application that can be download from the App Storeto your device. Video compressor compresses videos captured from the Camera App to save disk space on your devices.Video Compressor reduces over 70% of the file size when compressing a video from Full HD to 720p resolution. The application supports 720p, VGA and low resolution compression. The application also supports video trimming. Videos compressed using the application automatically save to a Compressed Video album in the Photos app on your device.
Instructions for Compressing a Video
Complete the following steps to compress a video captured with a tablet.
Download the Application
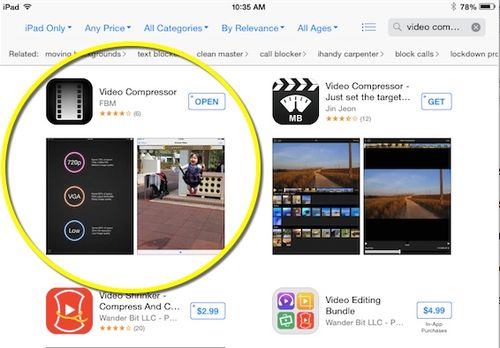
- From your tablet open the App Store and enter Video Compressor in the search bar.
- Download the application to your device.
Using Video Compressor
- Open the application.
- The home page will present three different compression options. It is recommended to select the 720 p option.
- Once a resolution option has been selected the application will open your videos from your Photo app. Select the video you would like to compress.
Editing Video
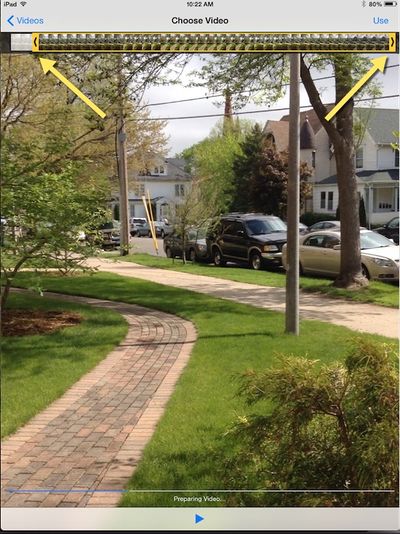
- The selected video will automatically launch within the application in an "Edit Mode"
- You can play the video by selecting the Play button at the bottom of the screen.
- To trim the beginning and/or end of the video simply select and drag the edges of the play bar. Anything outside of the yellow highlighted area will be cut from the video.
- Once you are done editing your video select Use in the upper right hand corner of the screen. Your video will then begin to compress. (This could take a minute or two depending on the length of the video).
Saving Disk Space
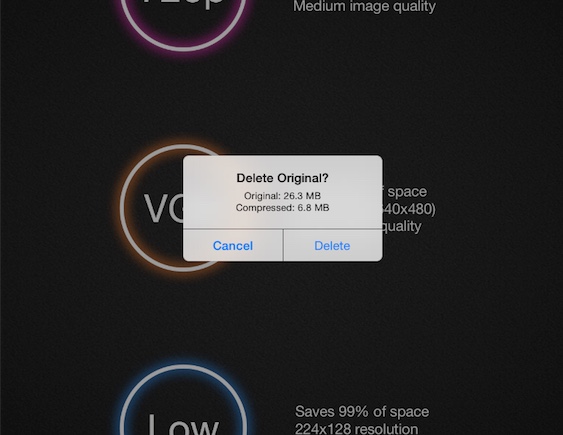
- Once compressed the application will prompt a message asking if you would like to delete the original video. In the message it will display the amount of space the original and compressed video are taking up.
- If you delete the original this will save disk space on your device. However the original video will no longer be stored on your device. If you have made edits to the original video and may need to go back and make further edits in the future you may not want to delete the original.
Accessing Video
- To access the compressed video open Photos application and select Albums from the bottom of the screen.
- Select the album titled Compressed Videos. All videos compressed using Video Compressor will be found in this album.
More About Video Compressor
Video Compressor From the App Store

