Create Brightspace seating charts
The Brightspace Seating Chart tool
The Seating Chart tool allows the teacher to create and maintain seating charts from within Brightspace. There are several steps involved in creating a seating chart:
- Selecting the locations in which you will teach.
- Opening your new seating chart.
- Select your classroom from the set of predefined location maps.
- Select the group of students you wish to seat and assign them to their seats.
For a complete description of the tool, refer to Brightspace Seating Charts in this Knowledge Base.
Creating your seating chart
Selecting your locations
If this the first time you are using the Seating Chart tool or you are teaching in a new room this semester, you will need to select your teaching locations as your first step. If you have created seating charts in the past and are not teaching in a new room, you can skip this step and move on to Naming your chart.
- Open the Seating Chart tool. Once you are in your course, you can access the Seating Chart tool under the Communication tab in the navigation bar or from the Learner section of Course Admin.
- If this is the first time you are using the tool, you will see one button: Manage Locations. (See Fig 1.) If you have used Seating Chart before, you will see two buttons: Create a Chart and Manage Locations. (See Fig 2.) To select or update your available location, click the Manage Locations button.
- To add new rooms to your list of available locations, click the checkbox before the room names you wish to add and click the Set Active button. (See Fig 3.)
- To remove rooms in which you no longer teach, click the checkbox before the room names you wish to remove and click the Set Inactive button. (See Fig 3.)
- Once you have updated your location list, click the Manage Seating Charts button to return to your seating chart list. (See Fig 3.)
Naming your chart
You will begin the process by opening the Seating Chart tool and naming your new Seating Chart
- Open the Seating Chart tool (if it is not currently open). Once you are in your course, you can access the Seating Chart tool under the Communication tab in the navigation bar or from the Learner section of Course Admin.
- Click the Create a Chart button.
- Give your seating chart a name. Be sure to select a name that will be meaningful to you in the future. Names like ENG 111-03 TR 8:30 will give you enough information to know what the seating chart refers to at a glance. (See Fig 4.)
Selecting your location
In the same box in which you just named your seating chart will be two additional dropdown menus, one for the location and the other for attendees.
- Click the dropdown labeled Location and select the room in which you are teaching. This list will be the same as the rooms you chose from the master list of locations in the steps above.
- Click the Attendees dropdown and select the list of students you wish to include in the seating chart. Usually this will be the entire list of students from the course (which may appear as the 11-digit course ID in this list), but it can also be any group you created using the Groups tool. (For more information on the Groups tool, refer to Brightspace Groups.)
- Click the Save button.
Assigning students to seats
The final screen in the process shows the name of the seating chart, the seating layout for the location you selected, and the list of students you chose.
- Scroll down the page to see your students. There will be a tray at the bottom of the page that shows all of the students in the group selected in the previous steps and their pictures (if they supplied them to Brightspace).
- Add you students to the seating chart by either
- dragging and dropping students into the appropriate seats in the location map, or
- clicking the Assign All button and selecting one of the options from the dropdown.
- Lock your seating chart to prevent accidental updates. You can do this by clicking the Lock button at the top left.
Updates to the seating chart are saved automatically.
Cold Call, Low Scores, and Attendance will be covered in the future.
Image gallery
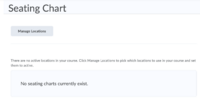
Fig 1. You must select locations before creating your first chart
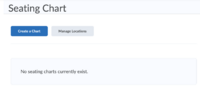
Fig 2. Create a new chart or update your location list

Fig 3. Select the locations in which you teach

Fig 4. Name you seating chart, then select the location and the group of students
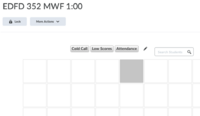
Fig 5. Students are assigned to specific seats


More Information
Related Wiki TopicsNo pages meet these criteria. |
For a complete listing of topics, select from the category list below.