Add a survey to your Brightspace course
Jump to navigation
Jump to search
Surveys are a great way to get information from students without a connection to the gradebook. Surveys can be anonymous or attached to a student. The survey took is available from the Assessments menu.
New Survey
- From the Assessments menu, select Surveys (Fig 1).
- Select the blue New Survey button.
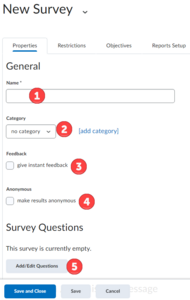
- Add a name (Fig 2.1), and category (if desired, Fig 2.2).
- If you want to provide instant feedback, check the box for instant feedback (Fig 2.3). This option will remove the Submit option and provide immediate feedback to the student.
- If you want to make the results anonymous (such as for a course evaluation), check the box for anonymous (Fig 2.4). Once selected, this can not be undone.
- Add survey questions (Fig 2.5).
Set up Reports
- From the Edit Survey menu, select Reports Setup (Fig 3).
- Add Report to create a new report.
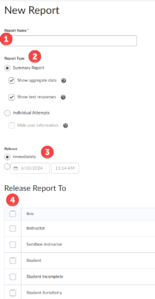
- Name the report (Fig 4.1).
- Identify the Report type (Fig 4.2). A Summary Report will aggregate all results. An Individual Attempt will show each student's responses. You can hide the students' names by checking the Hide box.
- Select the date for survey Release (Fig 4.3).
- Identify who will be able to see the survey report. Select any boxes that apply (Fig 4.4).
View Reports & Statistics
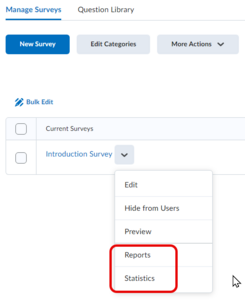
Statistics will show who responded to the survey and the date/time of submission (Fig 6).
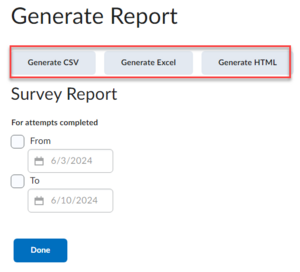
Reports will show the data based on the report setup (aggregate or individual responses). Reports can be exported or viewed online.


