DLC Spring 2024 Class Projects/Amy Hermodson Kaltura Capture
Project Details
This project is designed to help students within Professor Hermodson's course to download and use Kaltura Capture as your record video presentations. In this resource, you will learn how to download Kaltura Captura, record your screen, video and audio of you giving your presentations, and how to submit these videos to a Discussion for feedback within D2L Brightspace. The steps involved to complete your recording with Kaltura Capture are provided below.
Downloading Kaltura Capture
To access the Kaltura Capture you will need to follow the steps provided below.
1.) Use your favorite web browser to log into your MediaSpace account at mediaspace.minnstate.edu using your Star ID username and password. This will take you to your My Media page.
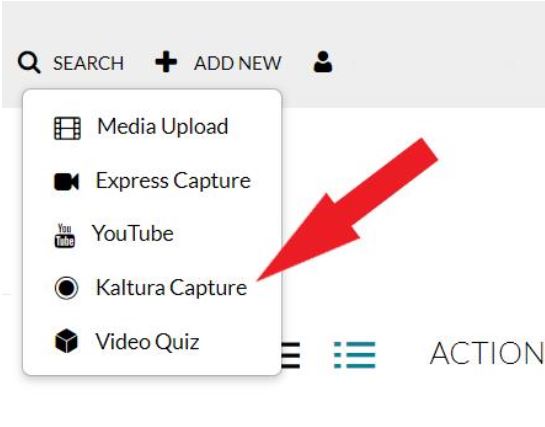
2.) Select Kaltura Capture from the Add New menu.
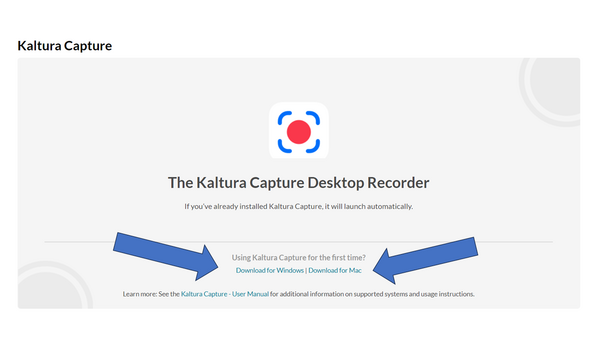
3.) Two options for downloading Kaltura Capture will be listed (PC and Mac) and after clicking on the appropriate version you will be asked to install the software video setup wizard.
4.) Once you have installed the recorder, you will need to exit out of the browser and then log back into MediaSpace using the link above and choose Kaltura Capture from the Add New menu and this time it will launch the software. Note:This step assures that your StarID account is loaded into the software so it knows what account to upload it to when you finish recording.
Recording with Kaltura Capture and Uploading to MediaSpace
Below are step-by-step directions for creating a recorded lecture using Kaltura Capture. In this process, you will capture a screen recording of your desktop displaying your PowerPoint slides. The steps outline how to launch Kaltura Capture, capture a screen recording of a PowerPoint, save the recording and upload it into your personal Mediaspace account.
Steps
1.) Launch the Kaltura Capture recorder from MediaSpace or from your computer once you have completed the installation process as described above.
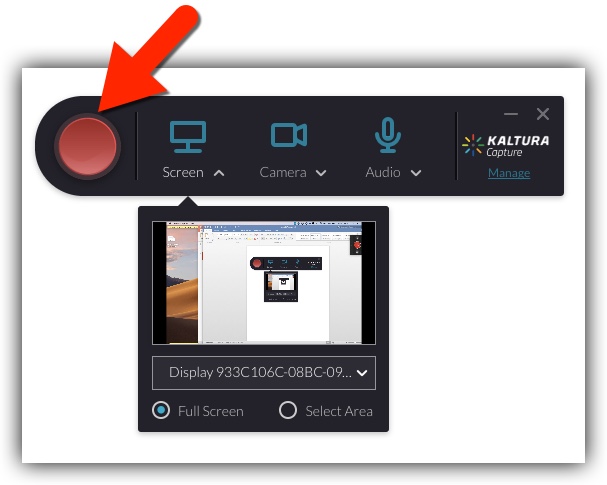
2.) The recorder displays 3 icons for recording options. To record your screen, web camera, and audio all icons will be blue. If you would like to turn off your web camera select the camera icon and a slash will be put through the camera icon. Select the Red Record Button to start the recording.
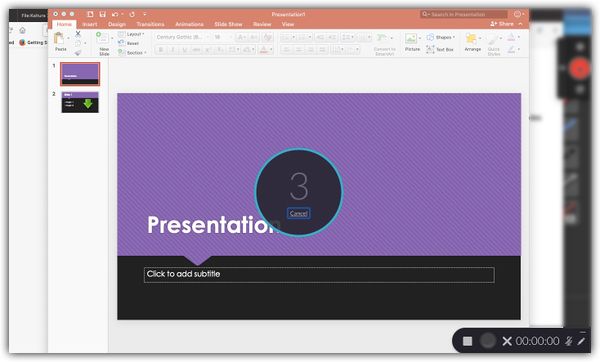
3.) A countdown will appear on the screen. Once it disappears you are recording.
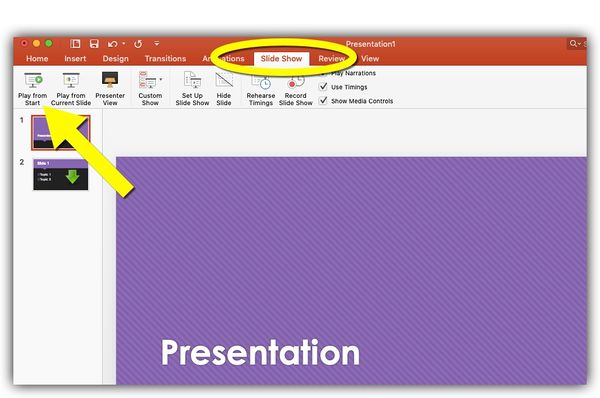
4.) Next select your PowerPoint and put the PowerPoint into Slideshow or Presentation mode. This will have the slides fill your entire screen. Once your slides are fully displayed you can start presenting. (NOTE: You can edit your video in post-production to delete the beginning section of your recording with the initial setup. Your final video can begin when you start presenting.)
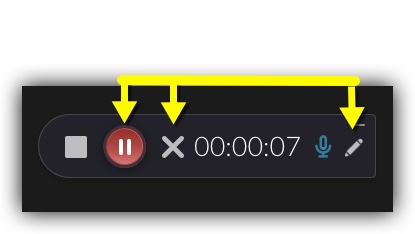
5.) In the corner will be the recorder. The recording panel helps you control the recording process.
- If during your recording you need to pause, select the Pause button from the control panel below the video.
- If you would like to start your recording over, select X from the control panel. Selecting Yes, Discard on the next screen will permanently delete your recording.
- If you would like to draw on your slides, use the Pencil icon to bring up the annotation tools.
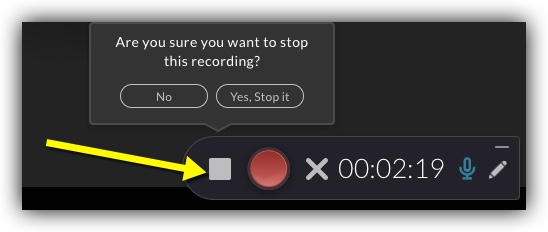
6.) When you are done, select the Stop button on the control panel to save a copy of the video on your computer and present a preview screen. It will prompt you to ask if you are sure. Select Yes, Stop It to stop the recording.
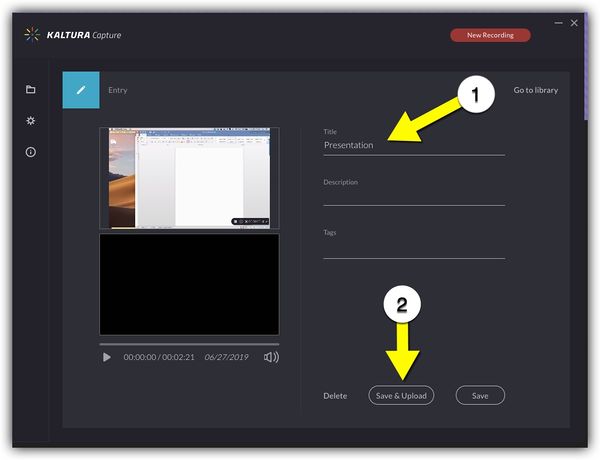
7.) This will bring up a preview of your recording. You can enter a title for your recording. Select Save & Upload to upload your video into your Mediaspace account. '
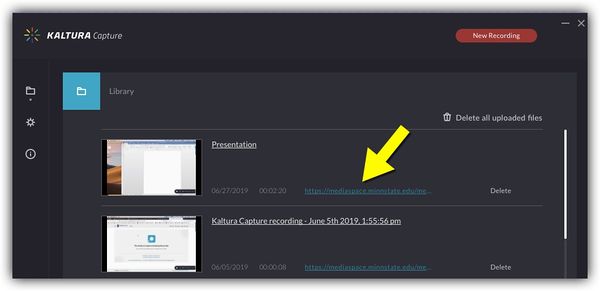
8.) Your video will start processing. Once your video is uploaded you will receive an email notification. Select the link below your video. This will bring you to the recording in Mediaspace where you can edit and view your video.
Editing Kaltura Capture Recording in MediaSpace
Below are step-by-step directions for editing your recorded lecture. In this process, you will cut off the ends of the recording to create a final version that only displays the presentation portion of the recording and removes the unwanted setup. The steps outline how to access the video editor, how to remove the beginning of the recording, how to remove the end of the recording, and how to save the edited video.
Steps
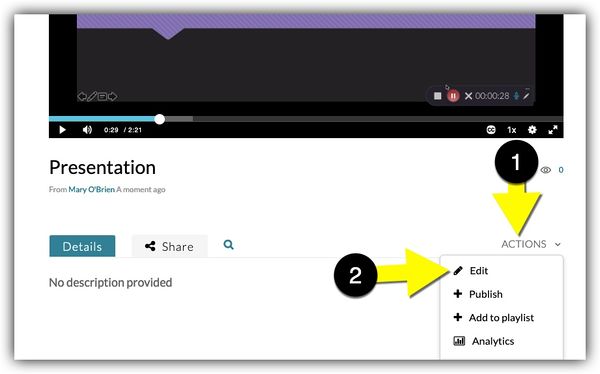
1.) When in Mediaspace, select the Actions dropdown below your video and select Edit.
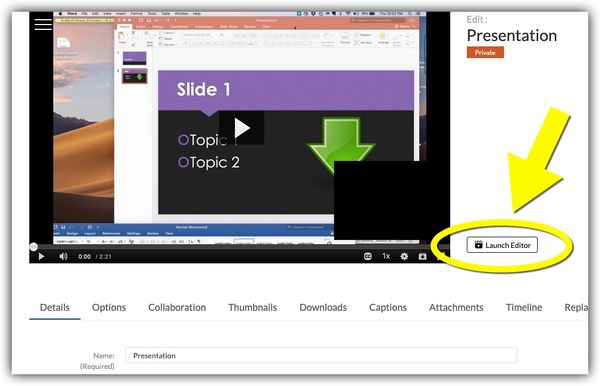
2.) Select the Launch Editor button beside the video. This will bring up the editor where you can cut the ends off your video.
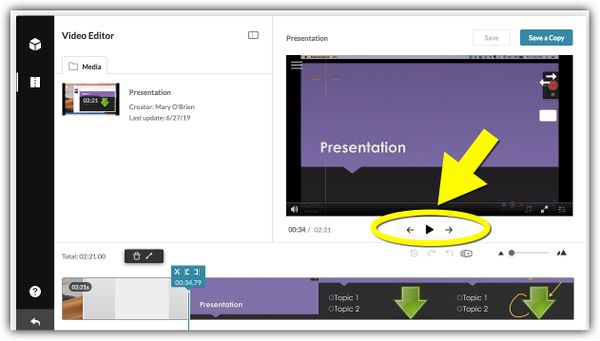
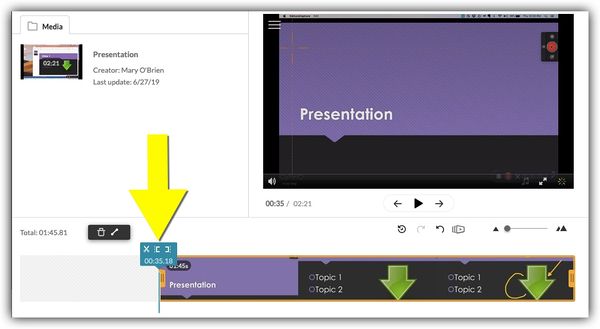
3.) Select the Play button below your video to start playing the recording. Select Pause when you get to the point in your recording where you would like the recording to start. (NOTE: This is when your PowerPoint is in Presentation mode and you have started presenting)
4.) Then while the video is paused, below in the timeline select the Set In icon which is the first bracket. This will cut out everything in front of the playhead and have the recording start where the playhead is.
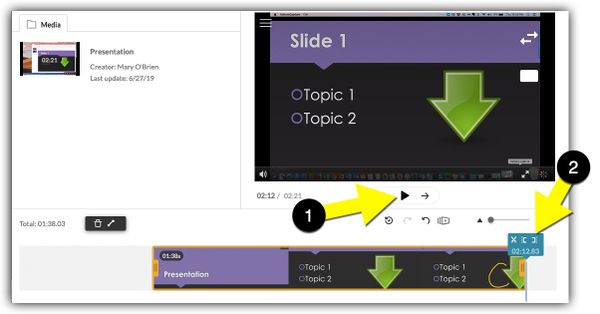
5.) Then select Play again and then Pause when the video is where you would like your presentation to stop. Then while the video is paused, below in the timeline select the Set out icon which is the second bracket and this will cut out everything behind the playhead and have the recording end where the playhead is. You now have the ends of your video edited. (NOTE: If your recording does not have extra footage you would like to remove you can skip this step.)
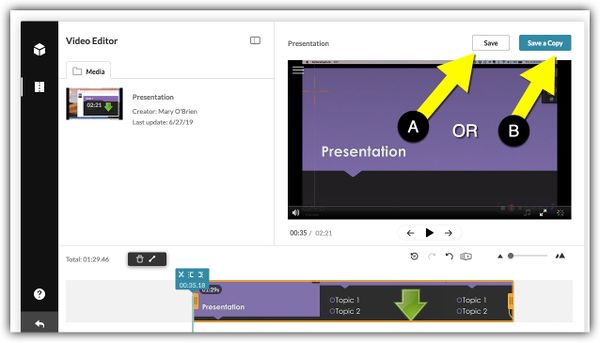
6.) You have two options to save your edited video. If you select Save, this will permanently save the edits you made to your original recording. Your original, pre-edit recording will not be replaced with the edited version. If you select Save Copy, a new recording with your edits will be created and your original version will remain intact. If you would like to retain a copy of the original recording, select option B. If you select this option, it will prompt you to enter a new title for your video.
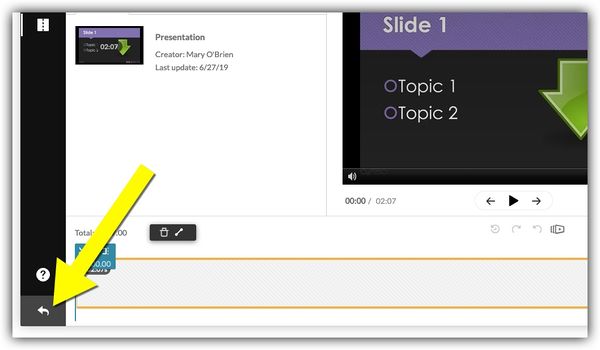
7.) When you are done and have saved your edited recording, select Exit Arrow in the bottom left corner. This will bring you out of the video editor.
Posting Your Video in D2L Brightspace Discussions
Below are step-by-step directions for posting your recording to a Discussion Topic for your classmates to provide feedback.
Steps
1.) Login to D2L and go to your course. Select the Communication tab from the navigation bar and select Discussions from the drop-down. Select the discussion board you would like to post to.
2.) If you are creating a new thread in the topic, click the Start a New Thread button.
3.) Title your post in the subject line and select the Insert Stuff icon below.

4.) Select Kaltura Media from the list of choices with the Embed button next to the recording you wish to post and then select Next at the bottom of the page.
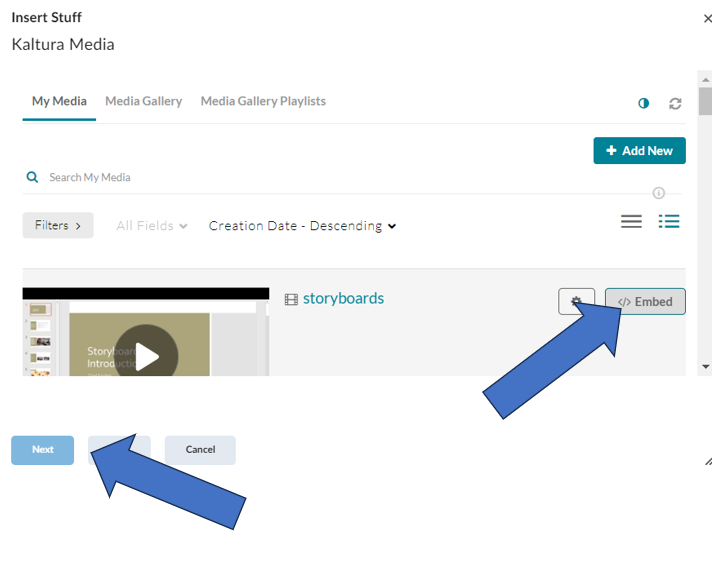
5.) The next window will allow you to preview of the recording. Click the Insert button.
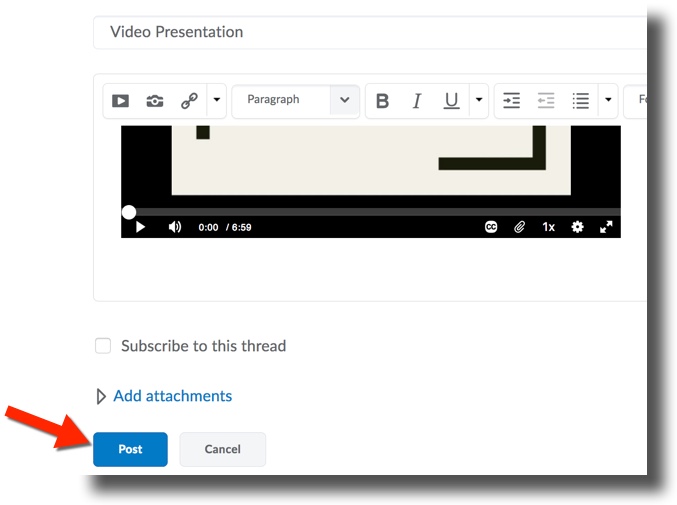
6.) Add any additional comments to your post and select Post at the bottom of the page to post your video to the discussion board.
DLC STARS/Presenter
Chad Kjorlien
- Phone: 507-457-5167
- Email: ckjorlien@winona.edu
- Office: Krueger Library #104
Other Resources
DLC Support
- Phone: 507-457-2206
- Email: dlc@winona.edu
- 1:1 Support: Krueger Library #105
