Draft:DLC Fall 2012 Class Projects/Nicholas Wysocki, WeeJungsun (EFRT308)
Jump to navigation
Jump to search
Human Relations and Student Diversity
Class Sections, Location, Days and Times
- Guildemeister 223
- Tuesdays and Thursdays
- 9:30 am, 12:30 pm, 2:00 pm
Project Details
- Final Digital Ethnography on Wordpress (project description)
Software Requested
- WordPress
- You Tube
Presenters and Training Schedule
- Requesting TLT/DLC staff come in and walk the students through the development of the Wordpress page as well as the uploading of a test YouTube video.
WeeJungsun
- October 4, 2012
- 12:30 pm - Jessica Nelson
Wysocki
- October 9th, 2012
- 9:30 am - Jessica Friedrich
- 2:00 pm - Jessica Nelson
Training Expectations
Student should know how to:
- Create WordPress account (needs to be a private account!)
- or Create new site on existing WordPress account
- Use templates - they can pick one out.
- Direct students to 'creating banners links' on the wiki if they are interested in creating a custom banner
- Link (not embed) video content, created on iMovie or MovieMaker and saved to YouTube
- Videos need to be private!
- How to add photos
- How to link to pdf files
- Create menu/6 pages
- Clinical page (pictures of people/places, no faces without permission)
- Audio/video page (student thoughts, expectations, concerns going into project)
- Research/reports (3 reports that they create, pdf links)
- Journal tables (field notes posted as pdf links)
- Names of Informants (bullet list)
- Reference page (posting pdf links)
- Use instructions that are provided for putting pages in alphabetical order.
- Would like Wiki backup
Self Instructions for Students
Step 1: Developing Your WordPress Page
- If you do not have a WordPress account, start here.
- If you have a WordPress account or when you are done setting up your account, follow the instruction guide provide for creating a static website in WordPress.
- Tasks: Create a secondary page, post a photo, post a pdf and create a link to that document somewhere within the page, and post a link to a You Tube video.
Step 2: Creating Your Video - Wiki Instruction
I will be using a Mac:
I will be using a PC:
Step 3: Uploading Your Video
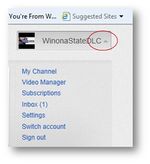
Here are the steps you will need to follow:
1. Create a YouTube account

3. Click My Channel
4. Create Channel
5. Upload video from your desktop, iMovie, or Movie Maker. Movie Maker will force you to fill out all of the fields (i.e title, description, and tags) before it will allow you to upload.
Helpful Information
- add links to 'creating banners" wiki pages
- WordPress Information and Presentations
Additional Information
If there are any questions on any other software the students will have to make 1:1 appointments with the DLC.