Save Office Documents On iPad
If you want to create documents on the go, you can use any of the Office applications that are available on the iPad. They are a great set of applications that allow you to create documents without ever having to open your laptop. To save and backup these documents there are cloud services etc. that you need to connect to your Office applications before you can begin backing up and saving to them. There are a number of services you can use, such as OneDrive for Business, your own personal OneDrive account, Dropbox, Google Drive etc. If you use these other cloud services you will need to install them and sign into them before you can save document to them.
There are a number of ways you can save documents made in Microsoft Word on your iPad.
- You can save your documents locally on the iPad itself. This is the most common and easiest method of saving your documents. However, these documents will only be saved on your iPad. To move them, you will have to save them via cloud.
- You can save the documents using Cloud services such as OneDrive For Business, Google Drive or Dropbox.
Save files Locally on your iPad
1. Once you are done with your document, press the back button.
2. Select “Save”.
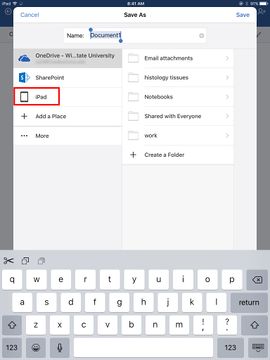
Rename your document and click on ‘iPad’.
Saving documents on the Cloud
If you want to save your documents out to the cloud you have to first add the services to the locations list on your iPad, so that they show up in the list of places where you can save your documents.
Adding Locations
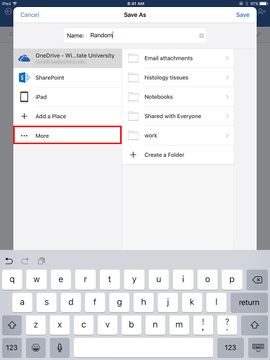
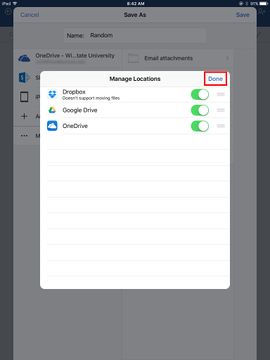
- Once you go to save a document, click on the “More” tab.
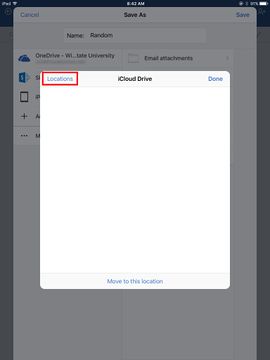
- Click on “Locations”
- Click on “More”
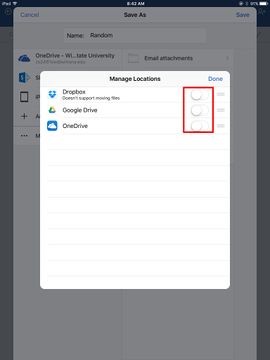
- Click on all the switches to turn on all the services available.
- Click on “Done”.
Saving To The Cloud
To save documents to your cloud services, you have to connect and add these services to your Office application. This process is different from adding the services to your list of locations.
Adding Your Cloud Services
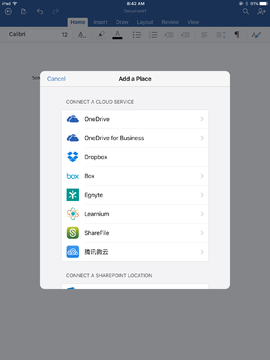
There are many services you can add to your list of Cloud services for saving your Office documents on such as OneDrive For Business (provided by WSU to all students), Dropbox, Egnyte, box, Learnium etc. To add these places in your list of Cloud services, follow these instructions:
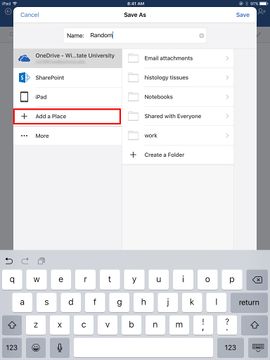
1. Once you are done with your document, press the back button and save the document.
2. Click on “Add a Place”.
3. A list of other Cloud services will show up. Select whichever Cloud service you want to add.
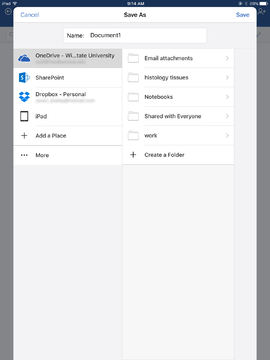
4. The service will be added to your list of places.
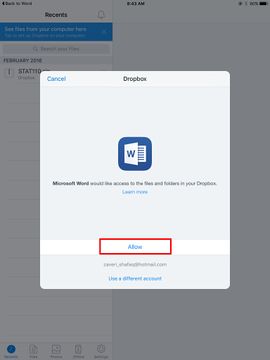
5. Depending on the service, you might have to log in and give your Office application permission to access the service on your behalf. E.g: Dropbox
Backing up your Documents to Google Drive etc.
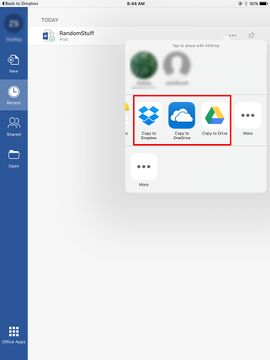
To back up your documents to services such as GoogleDrive, you have to backup each document manually and one-by-one since services such as GoogleDrive are not directly supported by Microsoft applications. To save your documents to other services, follow these instructions:
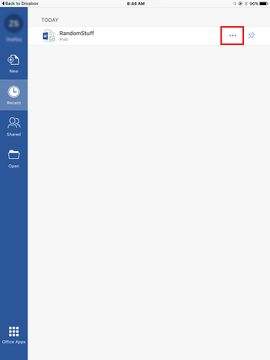
1. In your Recent documents tab, click on the three dots next to the name of your document.
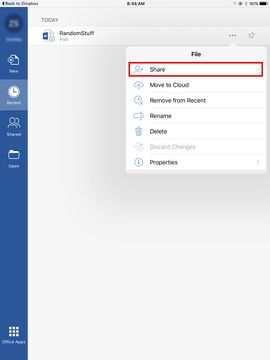
2. Click on “Share”.
3. Click on “Send a Copy”.
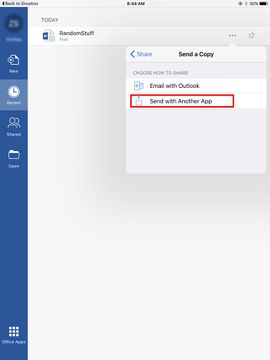
4. Click on “Send with another app”.
5. Select one of the options from the list of services.

