WordPress/How to Upload Audio to WordPress
Add an Audio File
To add an audio file you have to do two steps:
1. First you have to add the audio file you want to your StudentWebs folder.
To do this on a Mac:
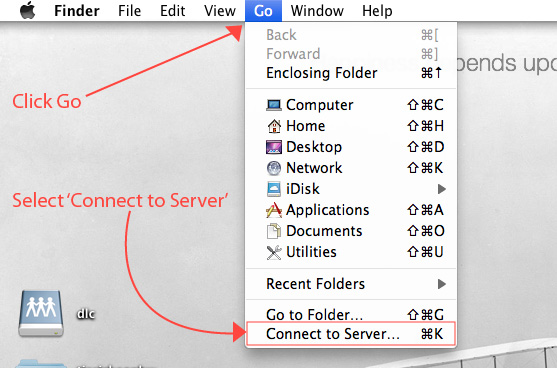
1. Open Finder, and under Go, select "Connect to Server".
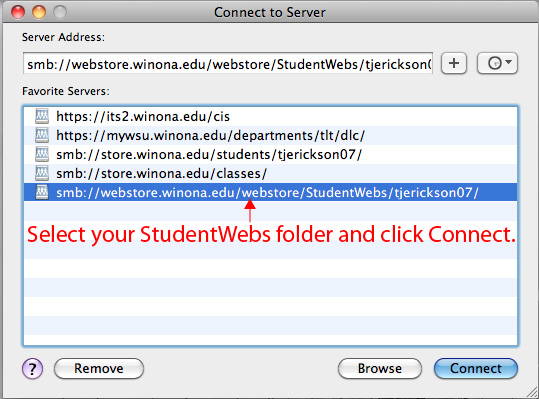
2. Enter your username and password. Select: smb://webstore.winona.edu/webstore/StudentWebs/YOUR USERNAME/
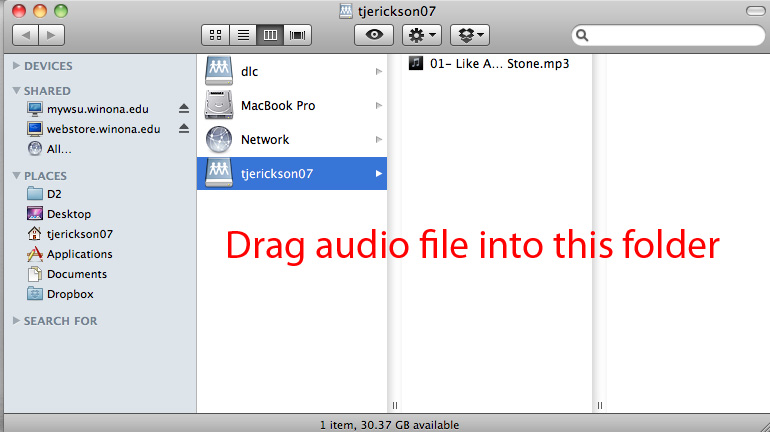
3. Drag your audio file into this folder.
(If you have any questions about this you can visit: http://learn.winona.edu/StudentWebs).
To do this on a PC:
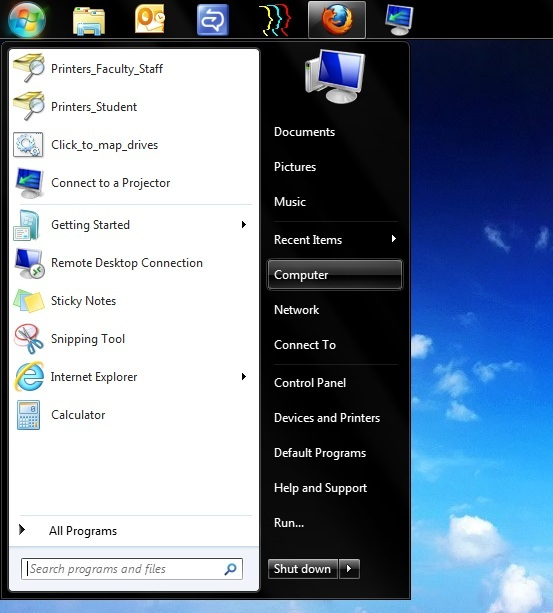
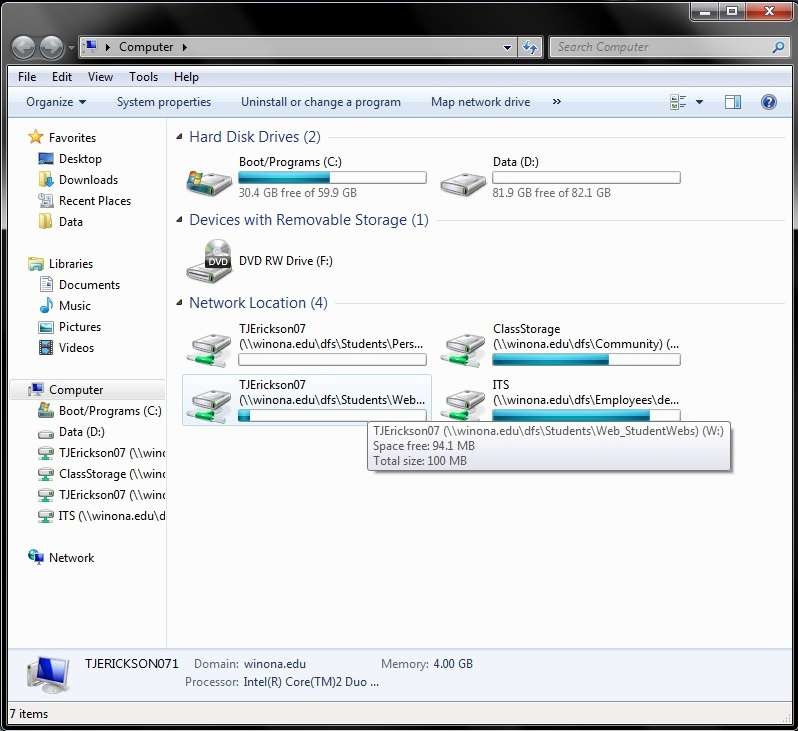
1. Open Start Menu, go to My Computer (press WindowsKey + E).
2. StudentWebs is already mapped to your "W" Drive. It also looks like YOUR USERNAME(\\winona.edu\Students\Web_StudentsWebs).
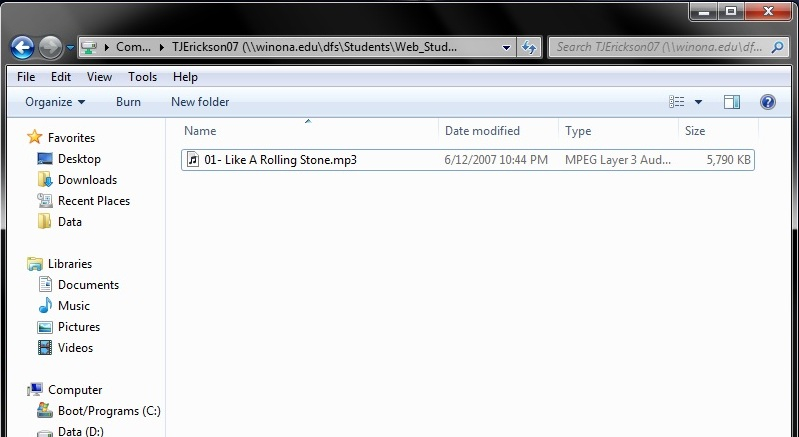
3. Drag your audio file into this folder.
(For more information visit: http://learn.winona.edu/StudentWebs).
On your WordPress page
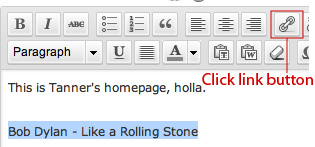
On your WordPress site, go to the Page you would like to add the audio file to. 1. In the main content box, type the title of the link you would like to use (ex. Like a Rolling Stone - Bob Dylan).
2. Highlight the text.
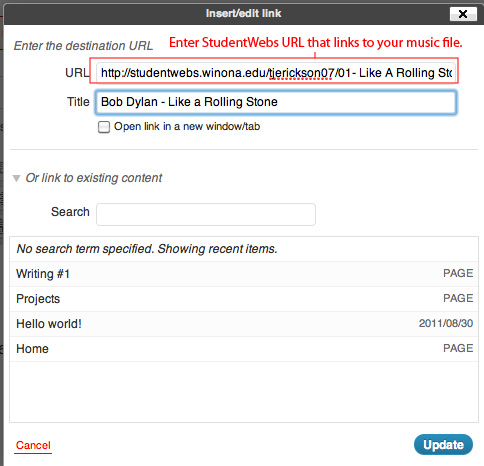
3. Click the "link" button in the toolbar, a dialog box will pop up, enter the URL for the audio file. An example is this: "studentwebs.winona.edu/tjerickson07/01- Like A Rolling Stone.mp3"
- Be sure to have think link as studentsweb.edu/<YOUR USERNAME>/<NAME OF FILE.mp3>
4. Click "Update" OR "Publish".
5. When you have added your audio file link, you can then view it on your page by just clicking the link. After you are done listening to your audio simply click the "Back" button to return to your Wordpress site.

